Adding/editing an event trigger
Event triggers are added/edited from within the Event Triggers option accessed from the Manage section of the main navigation menu.
Adding a new event trigger
To add a new event trigger, select the trigger type you desire from the drop-down tree-view list. Triggers are grouped by their target (E.g. a member) and the event category (E.g. Achievements).
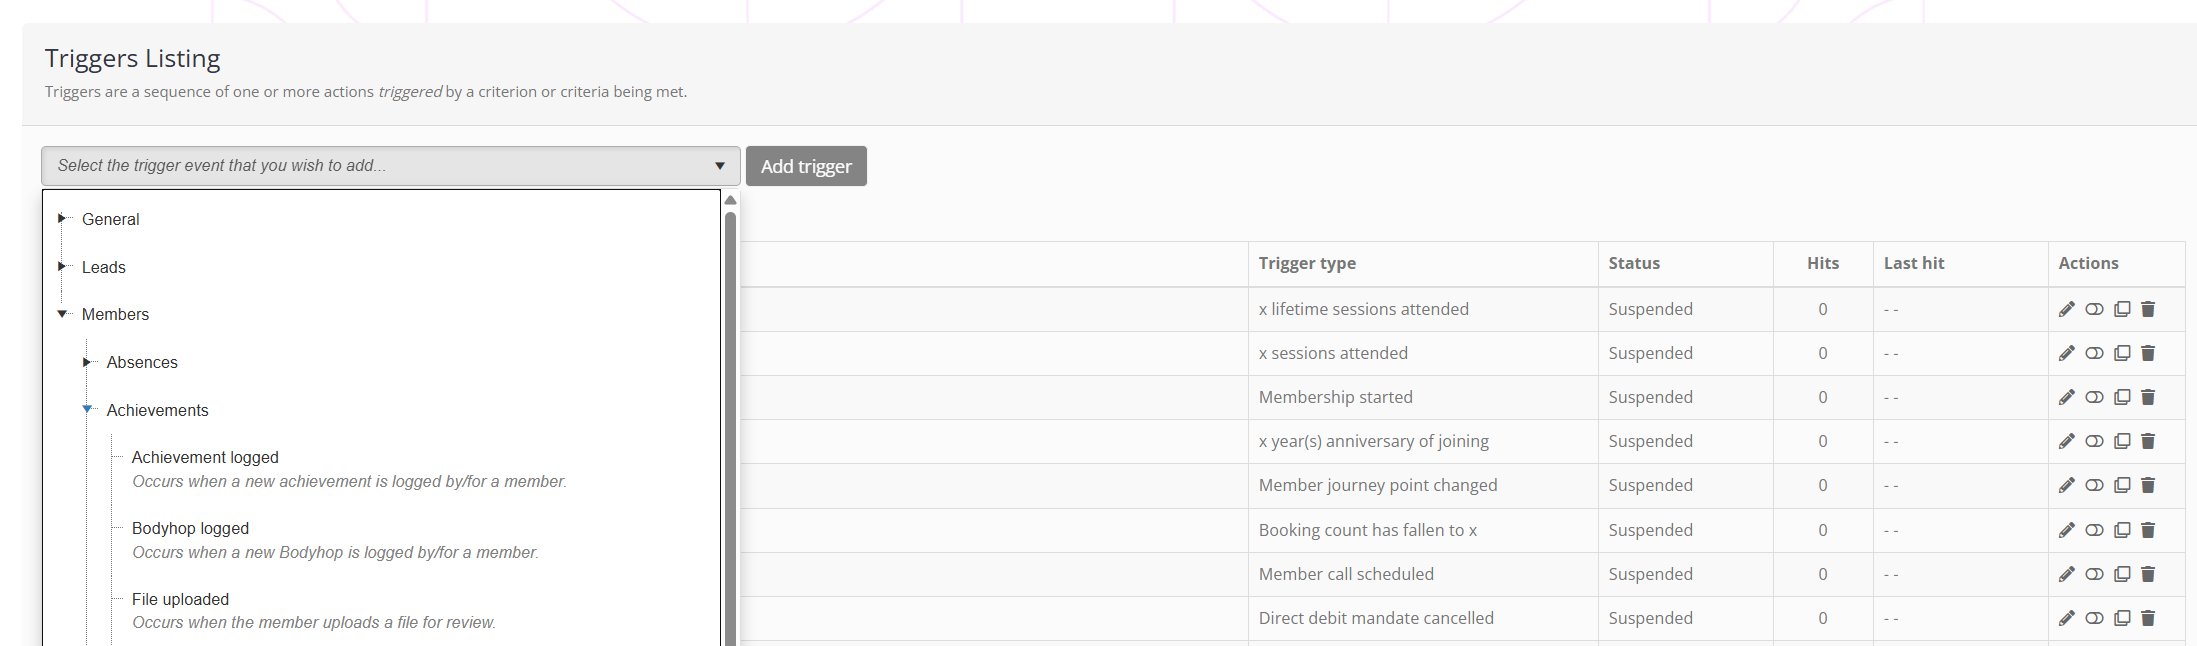
A list of event triggers and their summary definition may be found in the Event trigger types article.
Having selected the type of trigger that you wish to create, click the Add trigger button. You will then be taken to the Configuration tab of your new trigger, where you can continue setting it up as shown below.
Configuring an event trigger
There are two main elements to configuring an event trigger:
- Trigger Criteria
The trigger criteria are set on the Configuration tab of an event trigger. This is where, subject to the type of trigger selected, you set up the “rules” under which the trigger will execute. - Triggered Actions
The triggered actions are set on the Triggered Actions tab of the event trigger. These are the custom actions that you configure to take place when an event occurs, and the criteria of that event match the rules set in trigger criteria.
Trigger Criteria
The Configuration tab of the event trigger is where you set the trigger’s basic settings, along with any “rules” (the scope) that determine when it should “fire”.
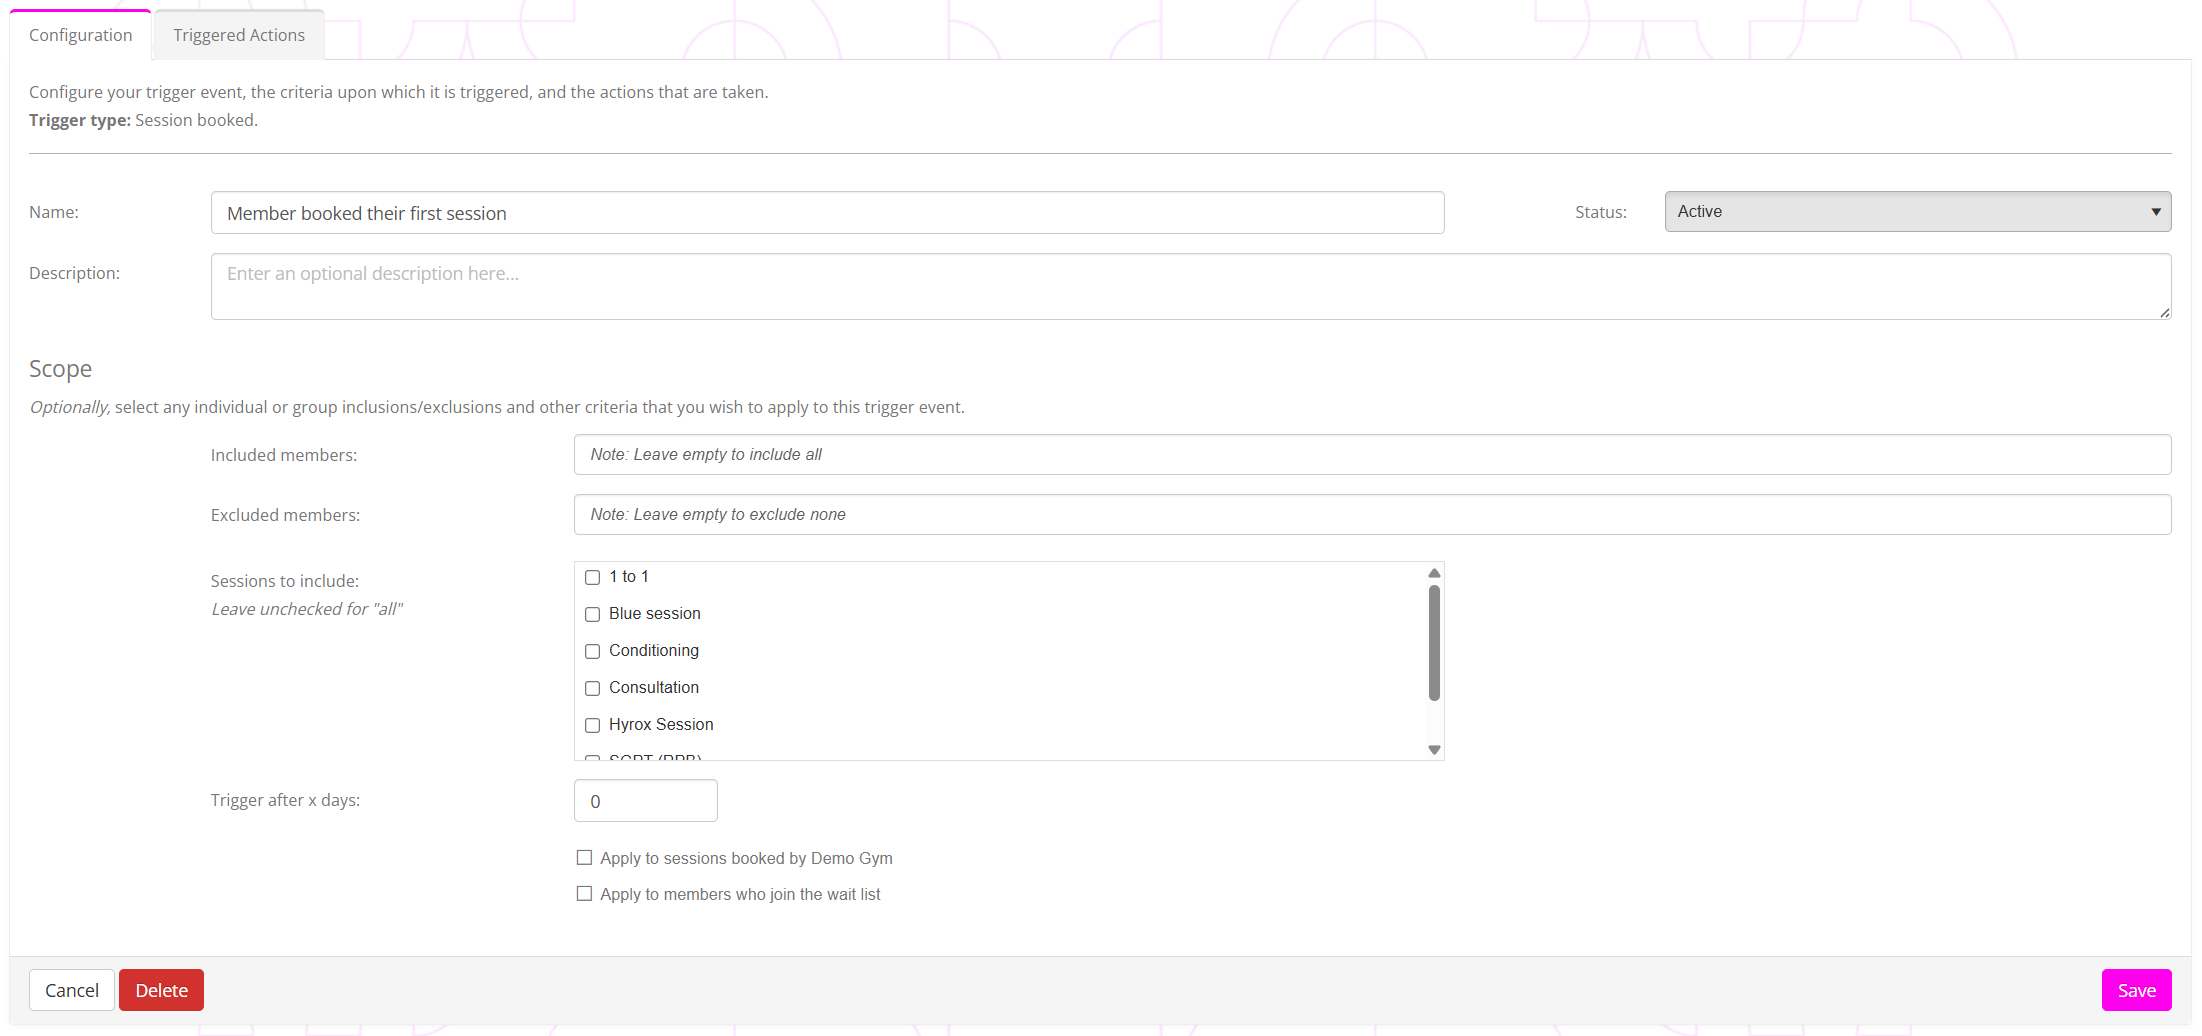
Each trigger comprises some common configuration elements, some context-relevant common elements, plus some context-relevant elements unique to that specific trigger.
The common configuration elements comprise:
- Name – provide a meaningful name for the trigger, so you can readily identify it in a list of other triggers.
- Description – often ignored, we recommend you add a description for your trigger and its intended use. This is useful later when you (or a colleague) return to it and try to figure out what your aim for the trigger was.
- Status – whether the event trigger is activated or not. By default, a trigger is configured as “suspended”, and then made “active” once you have completed configuration.
Context-relevant common configuration elements include:
- Included members/leads – A method for restricting the trigger to fire only for members/leads included within the selection.
We strongly recommend using member groups or lead groups as entries, rather than individual people. This is because you can readily edit the people within these groups without needing to go back in and edit every trigger where you have specified an individual.
The inclusion list is useful when testing a trigger, as it provides an easy method to restrict it to be eligible for firing only for your test member. - Excluded members/leads – A method for restricting the trigger to fire only for members/leads excluded within the selection.
As above, we strongly recommend using member groups or lead groups as entries, rather than individual people. This is because you can readily edit the people within these groups without needing to go back in and edit every trigger where you have specified an individual. - Trigger after x days – You may optionally defer the trigger actions by a whole number of days. The trigger still fires when eligible, but the actions arising from it are all delayed by the period specified.
If the trigger fires at 9:04am and is set to “trigger after 3 days”, the actions will take place on (or just after) 9:04am 3 days later.

Context elements unique to the trigger will be rules and criteria scopes that relate to the type of trigger being configured. For example, if the trigger were related to a session, one of the criteria might be the type of session for which the trigger is eligible to fire.
The trigger scopes give you the ability to create and tailor an almost endless set of workflows specific to different scenarios, and aware of the context in which they operate. By combining these with dynamic groups, you can further control and restrict the members/leads for which a trigger might fire.
Where trigger-specific rules/scope items are provided, these are described within the configuration page. In many cases, as indicated on the configuration screen, leaving a list of options unticked means all options are matched. Where you do not wish to restrict a trigger by that criteria, leaving the options all unchecked is a better option than checking them all, as it means that future options you might add are automatically eligible, without you having to go back into each trigger and check the newly added option.
Click Save to commit your criteria. If the trigger is new, the Trigger Actions tab will then become available and selected.
To delete a trigger, click the Delete button.
Triggered Actions
Once a triggered event occurs, a trigger is assessed against the configured rules/criteria, and the trigger is deemed eligible to be “fired”; the actions defined on the Triggered Actions tab are processed.
A trigger must have a minimum of one active action configured against it; otherwise, the trigger will be deemed inactive.
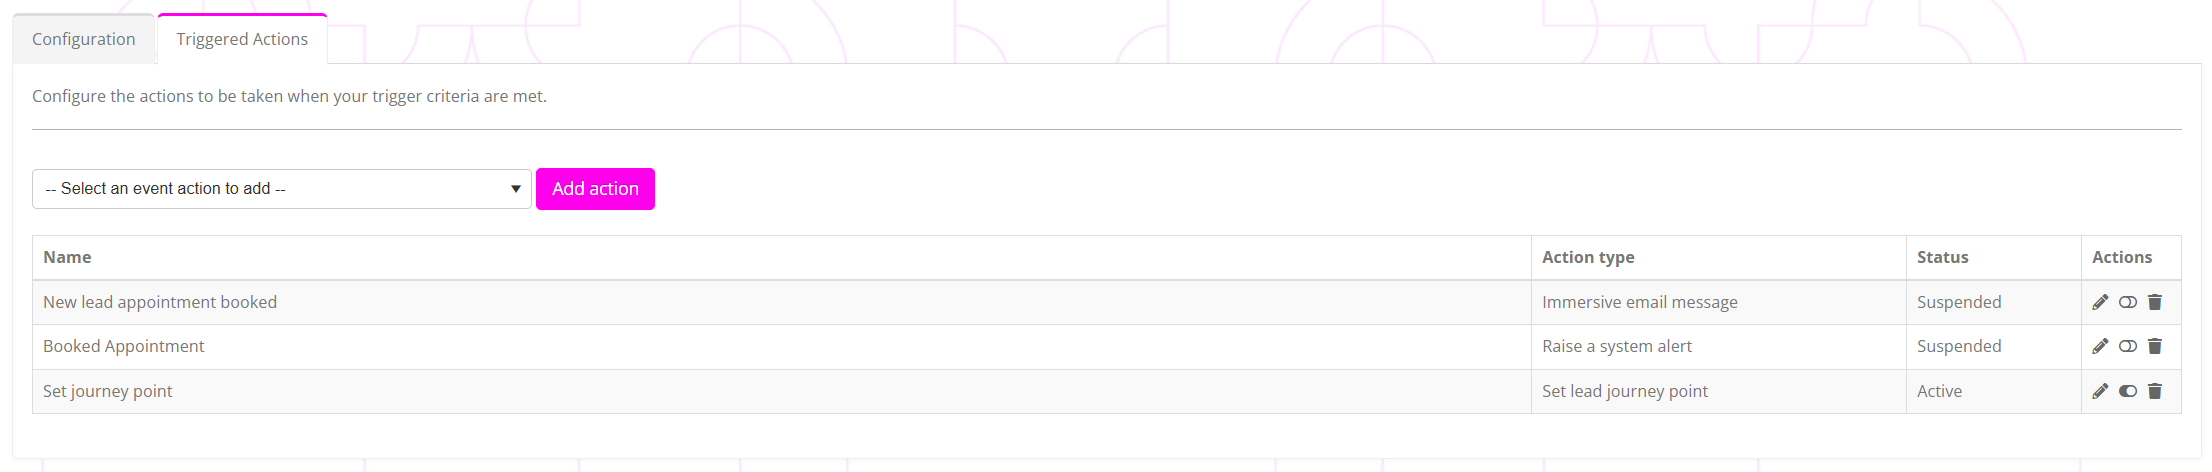
Actions are displayed in the order in which they are added. The name allocated and the action type are displayed, along with the status (active/suspended).
For each triggered action, a number of actions are available:
- – Edit the action.
- / – Toggle the status of the action between suspended and active.
- – Delete the action.
Adding a new action to a trigger
A new action may be added to a trigger by selecting the desired action from the drop-down list and clicking Add action.
The actions available for a given trigger event depend on the target (I.e., member, lead, or participant) and the type of trigger. Details of the trigger actions and their purpose may be found in the Event trigger actions article.
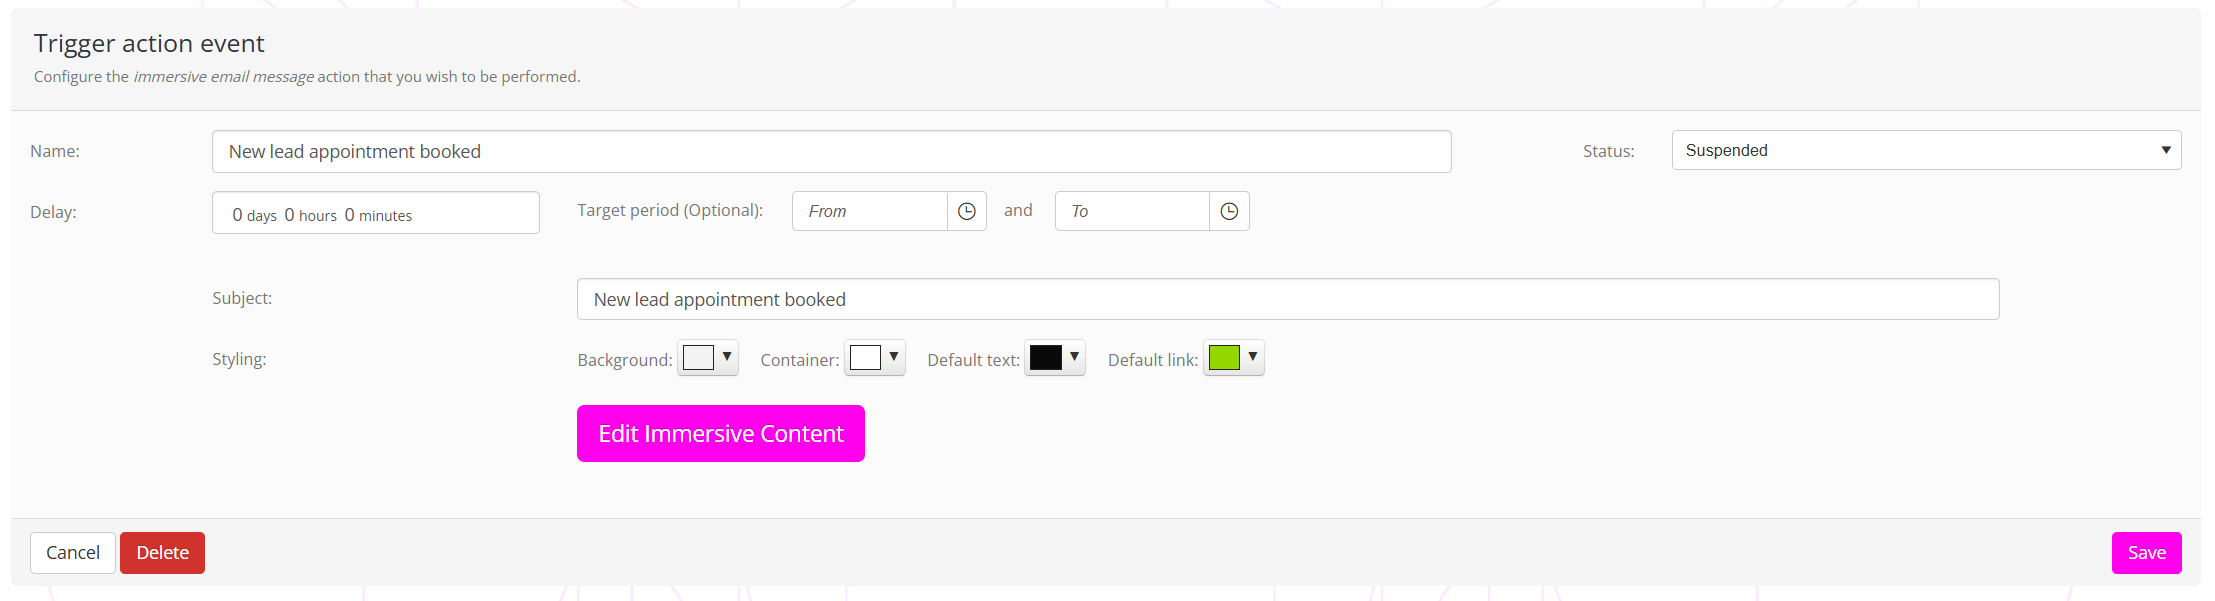
Similar to the trigger criteria, each trigger action includes a common set of configuration elements, some context-relevant elements, and a unique set specific to that action type.
The common configuration elements comprise:
- Name – Provide a meaningful name for the action performed by this step in trigger.
- Status – Active or suspended.
The context-relevant elements that will be made available subject to the action type, comprise:
- Delay – A time period that may be introduced to delay the action by a given period of time after the trigger fires.
This can be useful for events such as following up on a session booking, where the delay can be useful to give the air or the action being “human”, rather than automated. - Target period – Some actions, such as messages, may be assigned a “target period”. The action is delayed until between this time, before the message is sent. This can be useful for containing messaging within sociable hours; otherwise, the send time will be determined by when the trigger occurs.
Some actions may have relatively few configuration elements, whereas some may be more complex and require greater configuration.