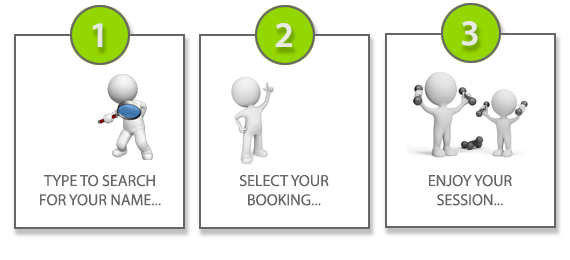
Enabling the kiosk scanner feature
The self-check-in kiosk supports the use of a scanner to streamline the check-in process further. The member scans the barcode displayed in their GymOS FitnessHub app. This is an alternative to coaches checking in members or the member using the GPS check-in feature in the mobile app.

To use the scanner feature in the check-in kiosk, it must be enabled first. To do this, go to Settings from the main GymOS menu and scroll to Kiosk Settings. Enable the scanner function by clicking the Enable Scanning button.
Important: This will set the barcode parameters to work with the kiosk and ensure that every member is assigned a unique member ID correctly. Please don’t use this feature if you already use the Access Control barcode for a different system, as your codes will be permanently overridden.
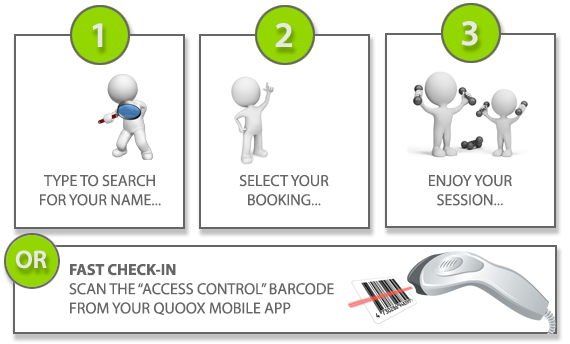
The setting change may take up to 15 minutes to propagate the GymOS server network. Once enabled, the image on your kiosk page will change from the image on the left to the image on the right.
A quick explanation of barcodes
A barcode is a graphical representation of a piece of text. A 1D barcode is the traditional “stripey” barcode, and a 2D barcode includes QR codes (the “dotted square”). 1D barcodes can represent a few characters, such as a member ID, whereas 2D barcodes can contain more data.
A barcode scanner operates the same as a keyboard. When it scans a barcode it simulates the keypresses of the characters that it read, followed by a simulated press of the “Enter” key.
Thus, when you scan a barcode, it is essentially “typing the number/code” into your device.
Barcode scanner types
There are multiple types of barcode scanners. All modern scanners can read the Code-128 1D barcode used by the Quoox kiosk, which is a long-established format.
Barcode scanners may be handheld, desktop, or wall-mounted. Typically they are either tethered (connected to a computer by a cable) or wireless (a Bluetooth connection).
Wired scanners are suitable for when you’re using a computer to operate your Quoox kiosk. A Bluetooth scanner is suitable for both a computer (with a Bluetooth connection) and a mobile device, such as a tablet.
Scanner requirements
Quoox does not provide, recommend, or support scanner hardware. We have designed the kiosk scanner implementation to be extremely simple and supportive of the most common scanner operation method. We have tested the functionality with all common scanner types and found it to be compatible with them all.
If you operate the kiosk on a tablet, you will need to source a Bluetooth scanner. If you have a computer, we recommend a wired (USB) scanner.
When using a Bluetooth scanner, we recommend connecting it to a power supply as well, so that it remains charged. When powered, you can then enable the “auto-scan” function of the device (if it has it), so that the member doesn’t need to press a button and, instead, the scanner simply scans any barcode it recognises placed in front of it.
The scanner must support Code-128 barcodes (most do) and must be configured to add a line-feed at the end of the scan. For most scanners, this is the default configuration. You will want to ensure the scanner you choose is “mobile-friendly,” meaning it is designed to scan barcodes behind glass. Not all scanners are compatible with the reflections from mobile screens, so be sure to check for this before purchasing your scanner.
Scanners tend to be incredibly easy to set up, and most come with very simple instructions to get started.
To test your scanner (before trying it with GymOS), open a Notepad or text document and attempt to scan any barcode. You should see the text appear in the document. When you reach this stage, you know your scanner is functioning correctly.
Scanning with the kiosk
To check in using the barcode function, a member scans the “Access Control” barcode in the GymOS FitnessHub mobile app, located in the top menu.
Once a member scans a barcode, the kiosk will seek any bookings for the member within the self-check-in window. The check-in window starts 15 minutes before the scheduled session start time and ends 15 minutes after the scheduled session end time.
If the scan is successful and a corresponding session is found, the member is marked as attended, and no further action is required. A confirmation message is displayed.
Exceptions:
- If the member barcode is not recognised, an error is displayed advising the member cannot be found.
- If the member has no sessions in the check-in window, an error is displayed that no bookings were found.
- If the member is already marked as attended, they are told they are already booked in.
- If the member is already marked as no-show, they are advised to speak with a team member.
The self-scan method is extremely fast, and a member can check-in within 5-seconds.
Scanner examples
Below are examples of three different types of scanners used during our testing. We have tried many more (all of which work), but these are provided as examples of scanner types that work with the kiosk.
For avoidance of doubt, we do not provide these as recommendations, and it is at your own discretion which hardware you opt for.
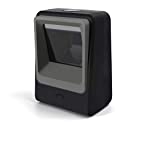
Desktop Bar Code Reader with USB Cable
Amazon
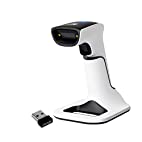
Wireless Portable Barcode Scanner
Amazon

Wired USB Scanner
Amazon
We would recommend not buying a scanner cheaper than, say, £20. Similarly, there is no need to waste your money on anything over £100.
Remember, your members will be using this hardware, so it may need to be replaced from time to time.
Tips
- If using a wireless Bluetooth scanner, connect a permanent power supply to it and, if it has it, switch it into “continuous scan” mode. This saves the member from needing to press the button and ensures your scanner remains charged and connected to the tablet.
- If you are using a computer for the kiosk, the desktop scanner is a good choice as it is rugged and typically defaults to “continuous scan” mode.
- On a tablet, we recommend opening the kiosk from a home page icon, so that it opens full page without the browser bar etc.
- On a computer, we recommend opening the tablet full screen, so as to hide the browser bar etc.
Disclaimer
Quoox does not provide support for the setup or implementation of scanner hardware. It is not practical for us to do so. If you purchase a hardware scanner, you do so at your discretion. Quoox is not liable for any purchases or costs that you voluntarily incur.
However, scanners are extremely simple to set up and use. Generally, they come “ready to go” out of the box. Certainly, we didn’t face any challenges with any of the scanners we tried during our testing.