Forms & questionnaires
Forms & Questionnaires within GymOS is an extensive suite of functions that supports various content types, including forms, questionnaires, contracts, PAR-Qs, check-ins, and other data-gathering and approval materials, which can be sent to members or leads for their review, completion, and/or approval.
This article guides you through the process of configuring a form for use with members and/or clients. Once configured, there are multiple methods for sending a form or questionnaire, including sending forms on a scheduled basis.
The forms listing
To access the main Forms & Questionnaires administration area, select Forms & Questionnaires from the Connect and Promote menu on the main navigation bar. This will open the listing of existing forms, from which you can amend forms that you have already created or add new ones.
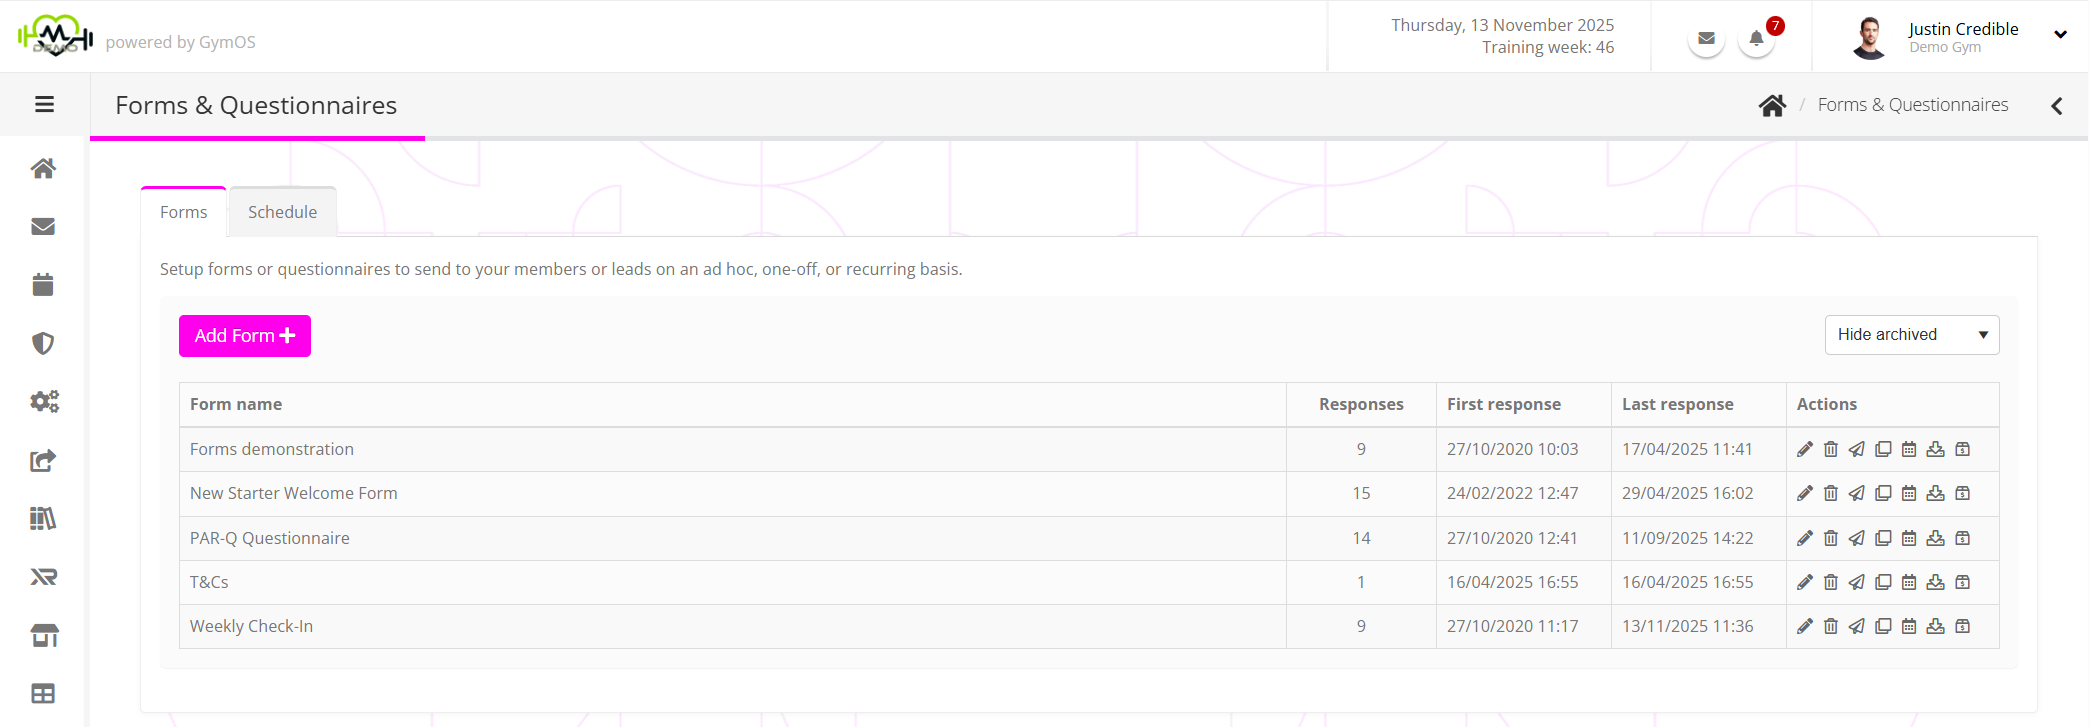
By default, the listing hides archived forms. You can amend this by changing the selection in the Hide archived drop-down.
The information displayed for each form item comprises:
- The name of the form.
- The total number of completed responses received over all time.
- The date and time at which the first response to the form was received.
- The date and time at which the most recent response to the form was received.
Alongside each form are several actions, available subject to the context and current status of the form:
- Edit the form
This can also be achieved by double-clicking the form row. - Archive the form
Akin to deleting the form. Archiving a form does not remove any completed forms. It does, however, cancel any pending forms of that type and corresponding form schedules.
An archived form cannot be unarchived, but it can be cloned (see below) and re-created as a new form. - Ad hoc send out
Send the form to an individual, multiple people, or groups of people immediately. - Clone
Clone the form as a new form, which may then be edited separately from the original. - View/Edit Schedule
View, add, and edit automated send-out schedules for the form. - Download all responses
Download all of the responses provided to a form as an XLSX Excel-compatible spreadsheet.
Configuring a form
To learn how to create a new form or questionnaire, check out the Creating a form or questionnaire article.
Scheduling a form for a one-off or recurring allocation
Information regarding how to schedule a form/questionnaire to be sent out on a recurring or automated basis may be found in the Scheduling the allocation of a form article.
Downloading all of the responses to a form
To download all of the responses for a given form, click the Download all responses icon corresponding to the form of interest.
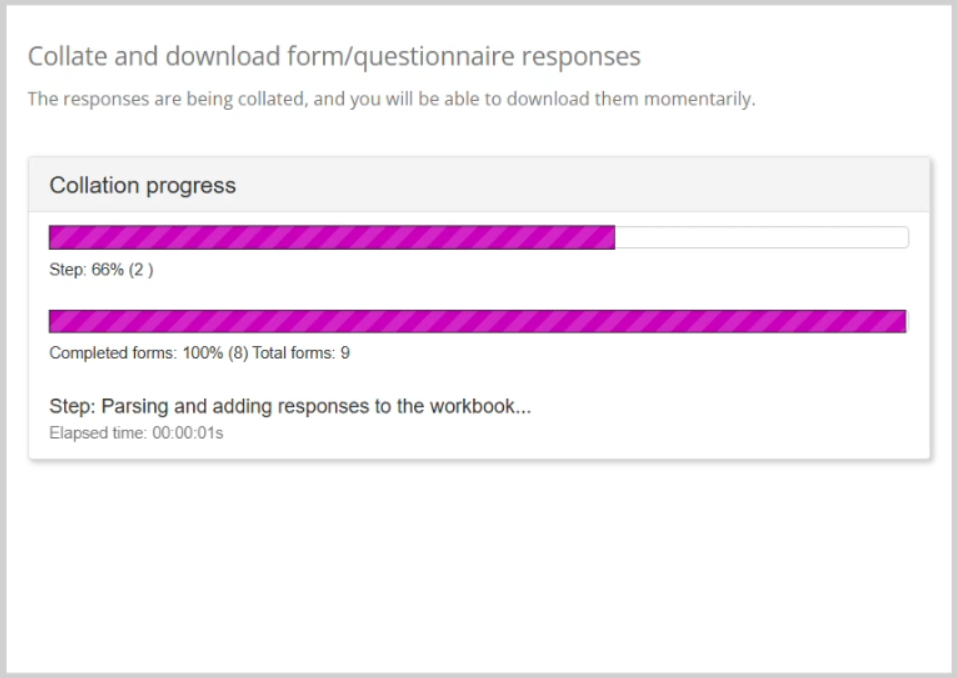
If the form has received numerous responses, it may take a few seconds or more to process. The collation progress is displayed on the screen while the spreadsheet data is being assembled.
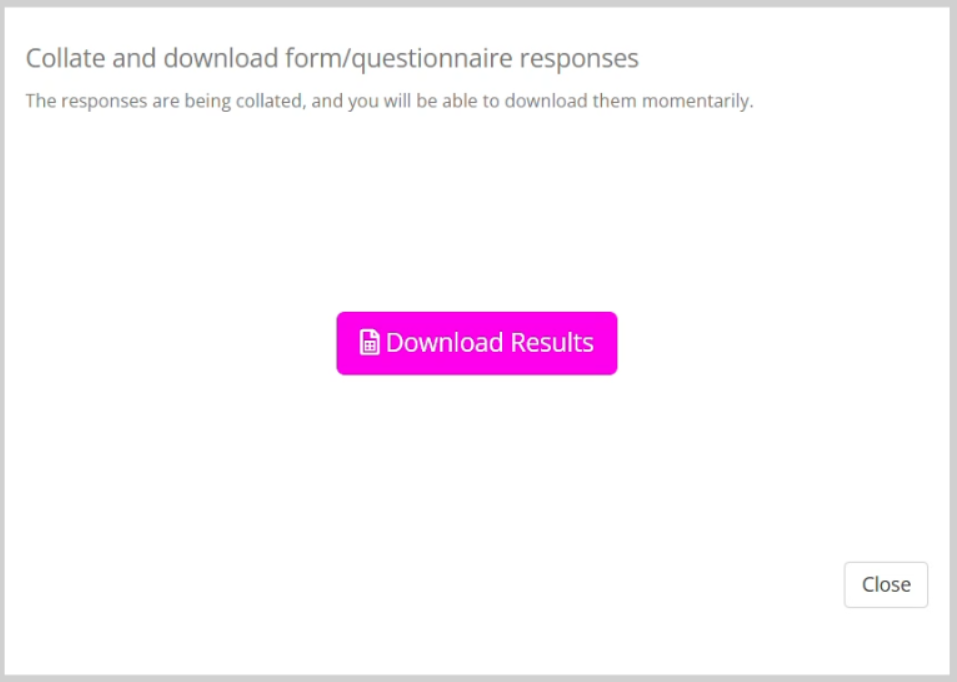
Once collation has completed, the download screen will appear, and the resulting spreadsheet can be downloaded by clicking the Download Results button.
The resulting spreadsheet comprises two tabs. The first is the list of questions. The second is the details of the respondents and the responses they provided.