Sending a form or questionnaire
There are numerous ways to send a form or questionnaire to a member or lead. The method of choice will likely depend on the context of the send-out and whether the allocation is manual or automated.
The methods include:
- Automated upon the creation of a member record
- Ad hoc from within the forms function
- Ad hoc from within a member or lead record
- On a one-off scheduled or recurring scheduled basis
- Upon the assignment of a membership to a member
- As part of a nurture sequence
- Triggered

Send a form upon member creation
You can configure a form to be allocated to every member when their member record is created. This can be useful for forms such as Terms and Conditions and other documents that require all members to complete.
The configuration for allocating a form upon member creation is within the Form Overview tab. To enable automatic allocation, check the “Yes” box alongside Do you wish to automatically assign this form to new members as they are created?
Also, you may choose to provide a number of days after which the form becomes mandatory and the member cannot book any further sessions until it has been completed. Use the value 0 to make the form mandatory immediately, and leave the field empty to have its completion remain optional.
Sending a form ad hoc to an individual or group
You can send a form on an ad hoc basis to one or more members or leads, groups, or memberships.
- Select Forms & Questionnaires from within the Connect and Promote section of the main navigational menu.
- Click the icon alongside the form that you wish to allocate. This will open the Send Out popup window.
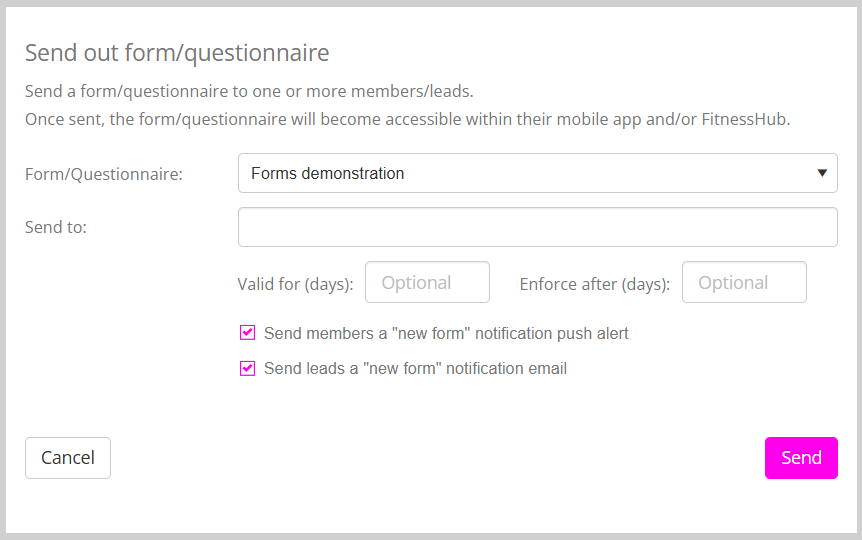
- By default, the form will be selected, but you may amend your choice as needs be.
- In the Send to box you may start typing to select the names of one or more individuals, groups, or memberships.
- If you want incomplete forms to be removed from the respondents account after a period of time, provide an entry in the Valid for (days) box. Leave this blank if you wish the form to remain allocated permanently.
- If you want to make the form mandatory and prevent a member from booking any further sessions until the form has been completed, provide a value in the ‘Enforce after (days)’ box. A value of 0 makes the form mandatory immediately. Leaving the field empty keeps the form as optional.
- A check in the Send members a “new form” notification push alert will send any members within the allocation list a push alert advising them of a new form to be completed.
Note: This requires the member to have the GymOS FitnessHub app installed, logged in, and to have granted permission for the delivery of push notifications. - A check in the Send leads a “new form” notification email will send any leads within the allocation list a push alert advising them of the new form to be completed. Leads complete their forms within the Guest Hub Lead Portal.
- Click the Send button to enqueue your form for immediate dispatch.
Sending a form from within a record
For both members and leads, you can send that individual an ad hoc form from the forms tab of their record.
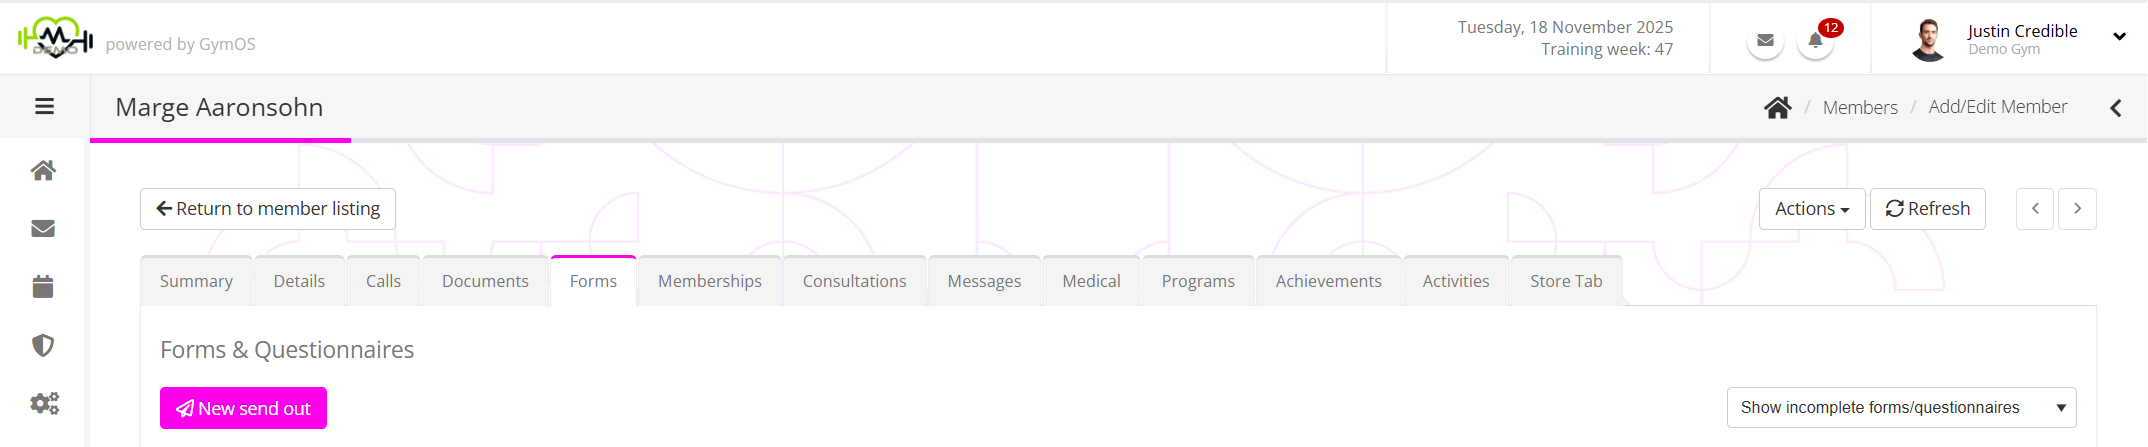
- Click the New send out button. This will open the Send Out popup window, prepopulated with the name of the individual associated with the current record.

- Complete the form in the same manner as outlined above.
- Click the Send button to allocate the form immediately.
Sending forms on a scheduled basis
You may optionally configure one or more schedules for the allocation of a form to an individual(s), a group, or membership(s). For example, you might allocate a 4-weekly check-in form to members on your premium SGPT package.
To configure a new one-off or recurring allocation schedule, follow the steps below.
- Select the Forms & Questionnaires option from the Connect and Promote section of the main navigation menu. You can view existing schedules for a given form by clicking on the View/Edit Schedule icon. Select the Schedule tab to view the complete list of all schedules.
- Click the Add Schedule button to open the Configure Schedule screen.
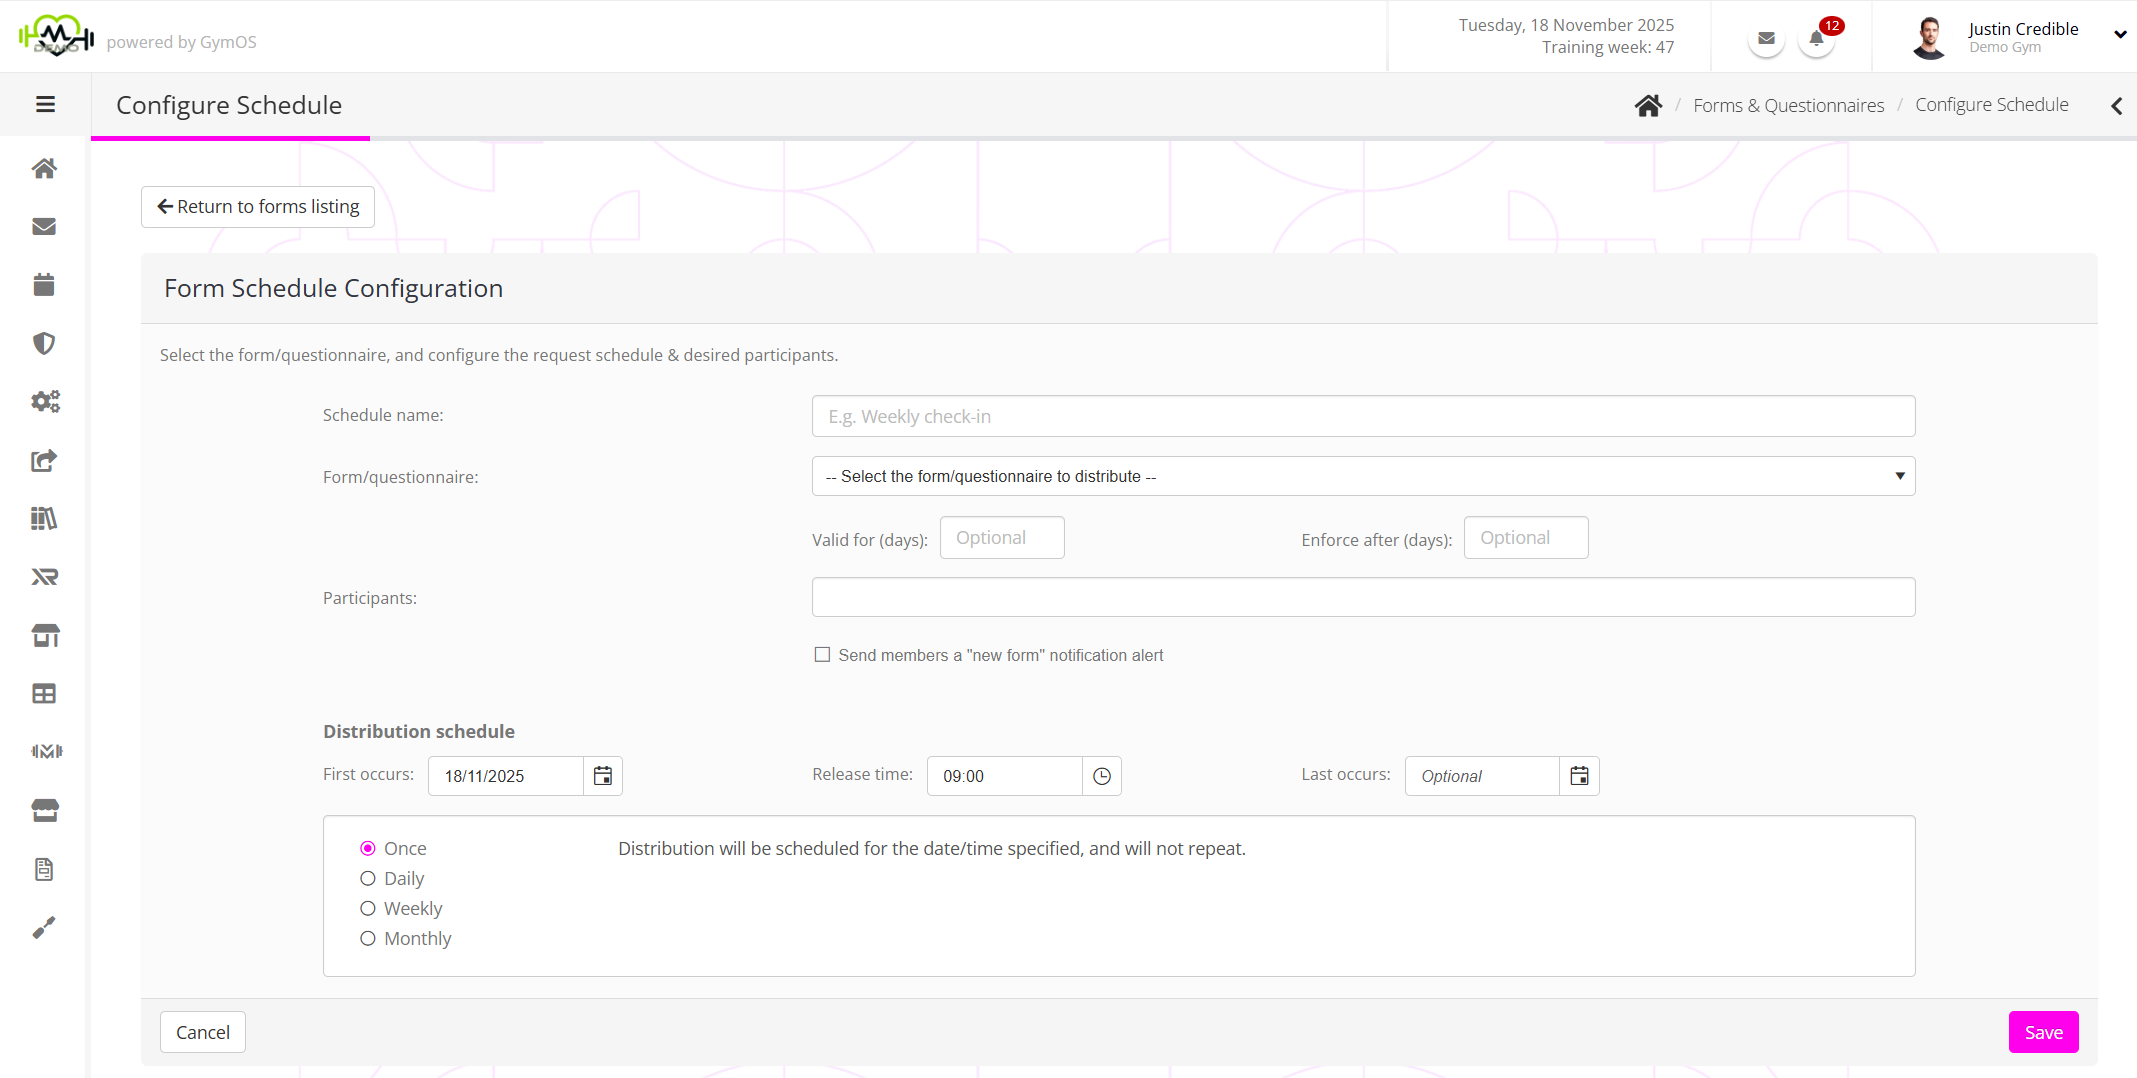
- Enter a meaningful name for the schedule (E.g. Weekly check-in).
- Select the form that you wish to schedule.
- If you want incomplete forms to be removed from the respondents account after a period of time, provide an entry in the Valid for (days) box. Leave this blank if you wish the form to remain allocated permanently.
- If you want to make the form mandatory and prevent a member from booking any further sessions until the form has been completed, provide a value in the ‘Enforce after (days)’ box. A value of 0 makes the form mandatory immediately. Leaving the field empty keeps the form as optional.
- Select the Participants to whom you wish to allocate the form.
For a recurring form, it is generally better to allocate it to a group or membership. That way, when a member leaves, you won’t have to update the allocation schedule manually. - Configure the Distribution schedule as per your requirements.
Please make sure that the first occurs and last occurs dates match the schedule that you select. I.e. If you want to send out on a Tuesday, please make sure the first occurs and last occurs dates are both Tuesdays.

Allocating a form upon assignment of a membership
Very often, a membership may come with specific terms and conditions that necessitate the allocation of a form to a member. Similarly, a membership may come with a corresponding onboarding questionnaire or a similar document.
You may easily assign a form to a member when they are assigned a membership, by allocating the form as a Deliverable against the membership.
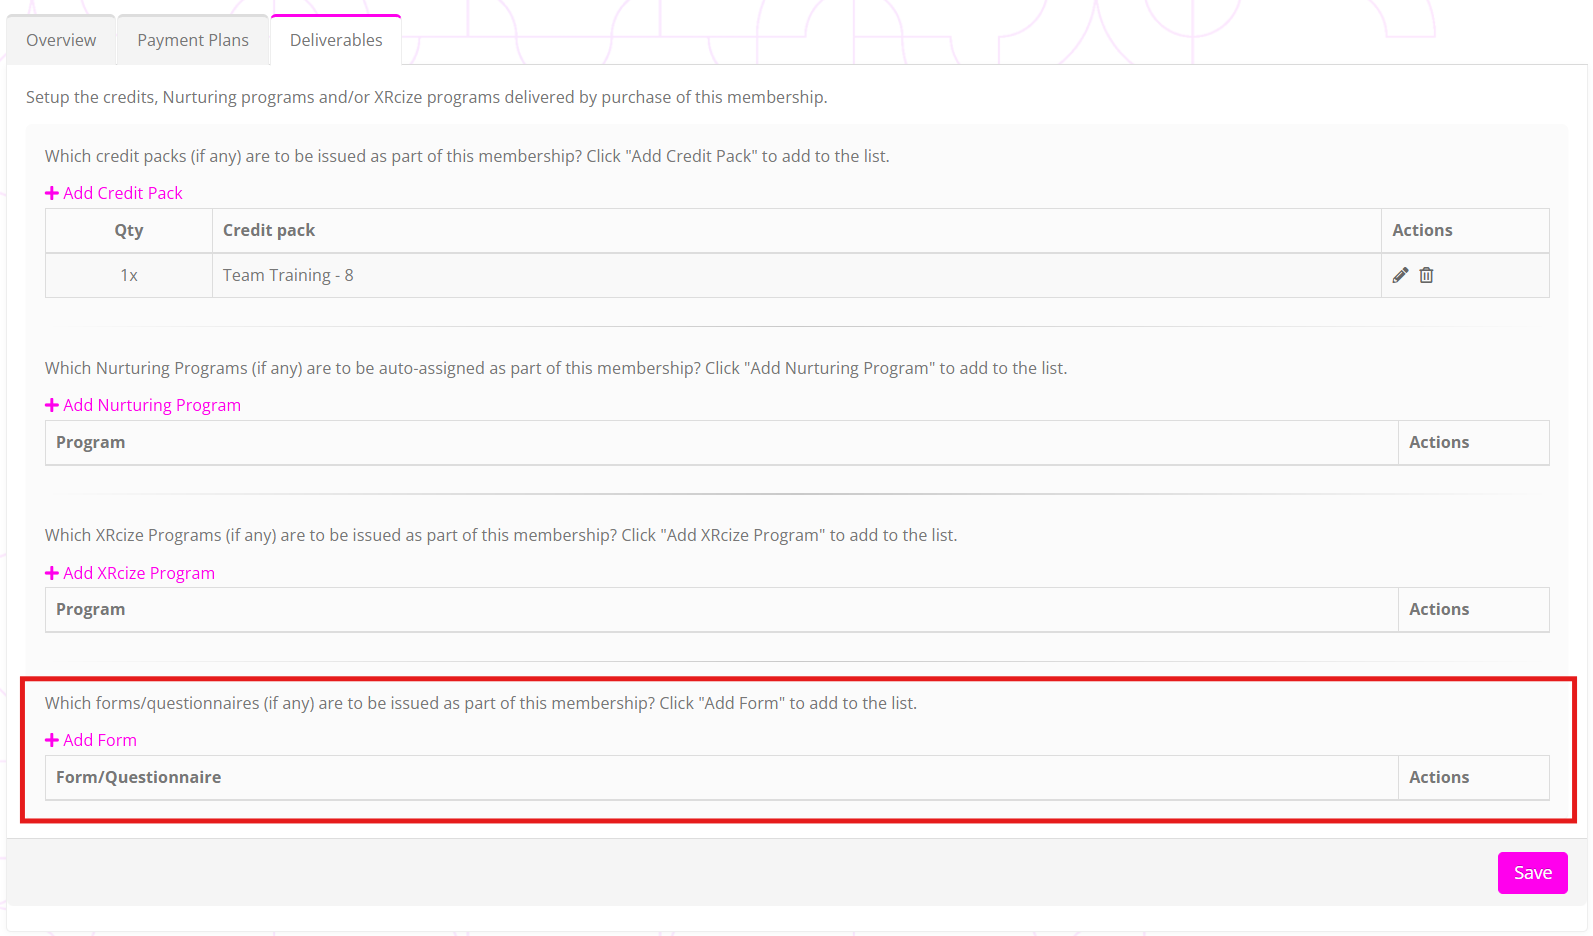
To allocate a form to a membership:
- Click the Add Form link on the Deliverables tab of the Membership Plan.
- Select the desired form from the dropdown list.
- Click the icon to accept your selection, or to cancel.
- Click the Save button to commit your configuration.
Note: The form allocation will only take effect on subsequent memberships that you add. GymOS does not respectively add forms to prior or existing memberships.
Allocation via a Nurture Program
Forms can be allocated to members or leads as part of a Nurture Program. This is a valuable way to assign a form to an individual as part of a journey you are leading them through.
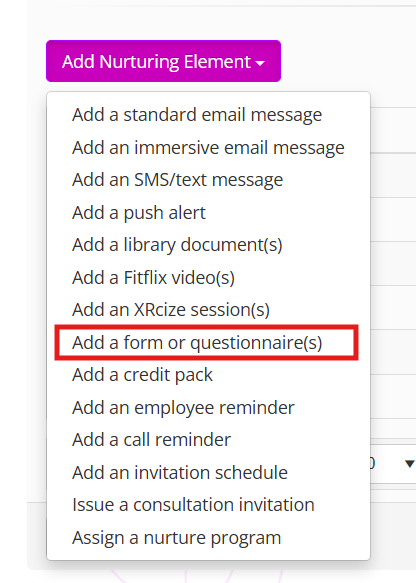
When configuring your nurture program, select the Add a form or questionnaire(s) option from the Add Nurturing Element dropdown menu.
In the new row that is added, select the form(s) that you wish to allocate from the dropdown tree list.
Enter the release point (day/time) that you want the forms to be issued on.
Click the icon to commit your changes, or to abort.
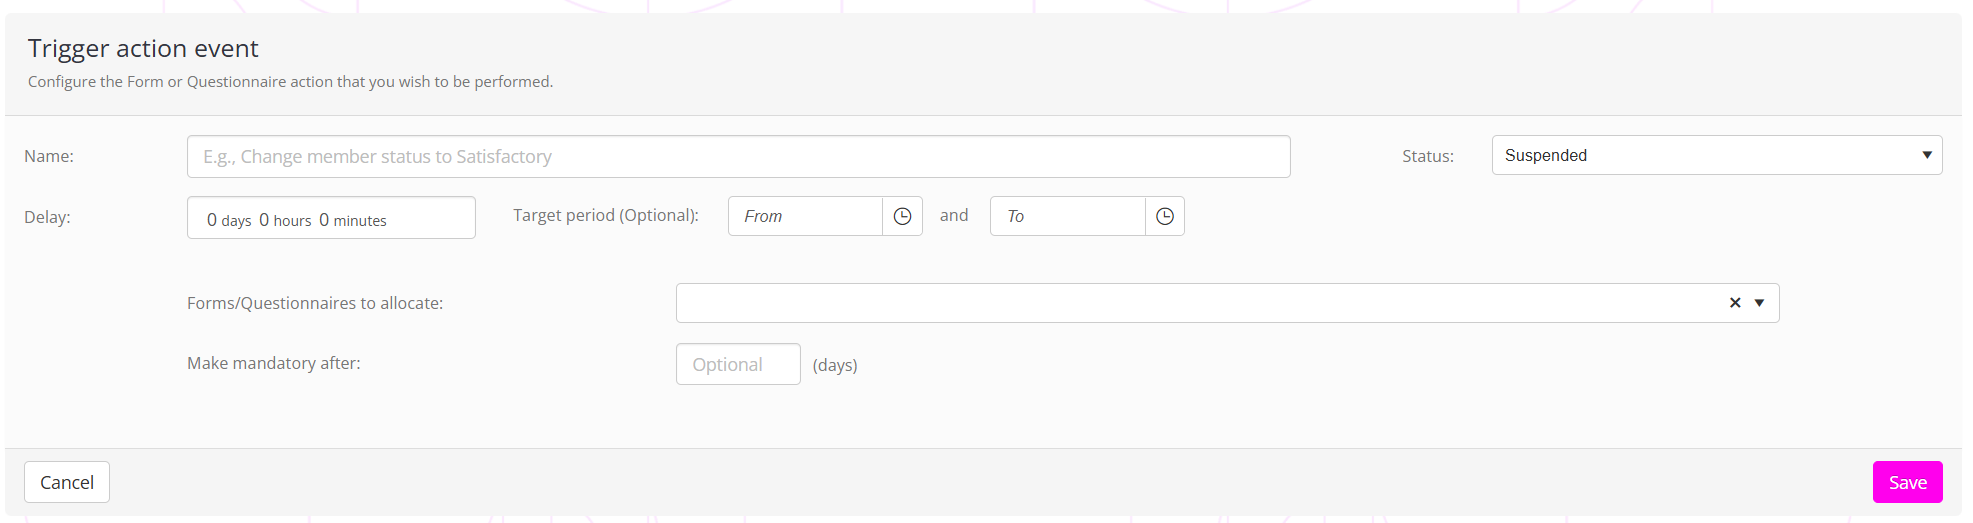
Allocation via a workflow or automation trigger
The Form or Questionnaire event action option within Triggers is a highly flexible way to allocate a form to a member or a lead upon the occurrence of an event, as defined by you.
For further details, refer to the Trigger Event Actions article.