Assigning a membership to a member
You may assign a membership to a member from the memberships tab of their member record. Before assigning a membership, you must first create and configure the membership type and plan.
To allocate a membership to a member, work through the following steps:
- Select Members from the Manage section of the main navigation menu. This will take you to the member listing.
- Locate the member to whom you’d like to add the membership, and open their member record.
- Select the Memberships tab on the record.
- Click the Add Membership button. This will open the Type/Plan step of the Add Membership pop-up wizard window.
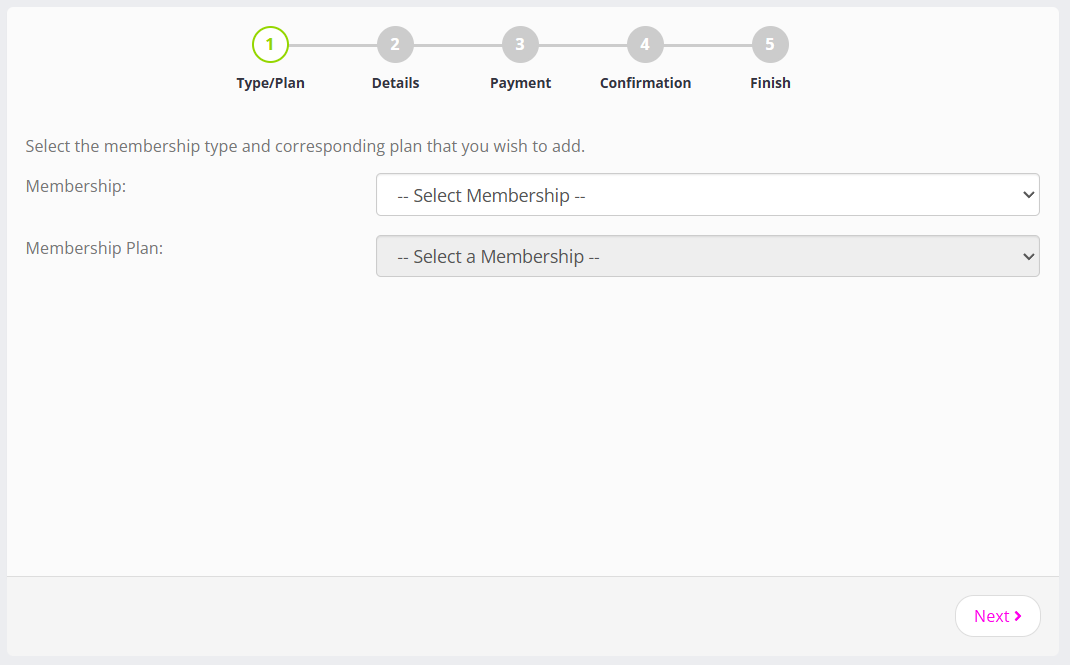
- From the Membership drop-down list, select the desired membership type to assign. This will then populate the Membership Plan list.
- Select the desired Membership Plan to assign, then click the Next button. The wizard will progress to the Details step.
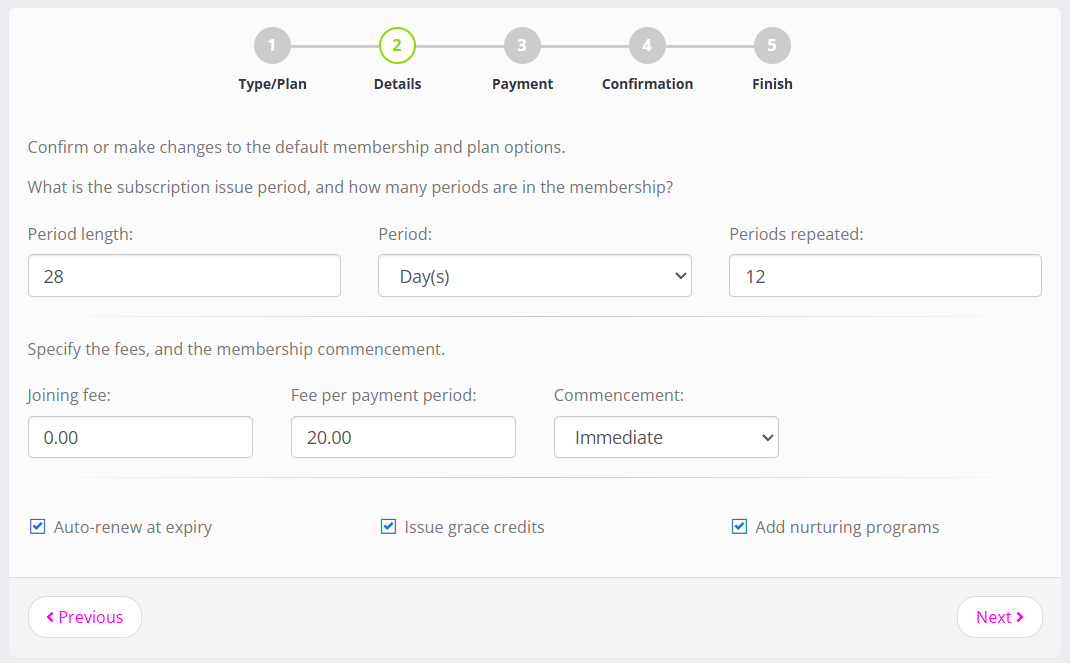
- The details page will be pre-filled from the settings you have configured on the selected membership type and plan. In most instances, these are likely to be the settings you want. Still, GymOS allows you to change them for a specific member, enabling you to tailor the membership for an individual without creating multiple versions.
You may choose whether the membership auto-renews at expiry, and whether you wish GymOS to assign any nurture programs associated with the membership. You may also opt out of issuing grace credits, but we generally recommend that you always issue grace credits.
Click the Next button. The wizard will progress to the Payment step.

- Select the payment method that will be used for each of the payments that occur as a result of this membership. Credit cards will be displayed in the drop-down list. If the member does not yet have a card on file, you may select the Add a new payment method to add a new payment card as part of the next step.
If you take the first payment by another means, such as an in-house credit card terminal, check the First payment will be taken using a method external to GymOS. This instructs GymOS not to charge for the first payment. GymOS will still generate an invoice (receipt) that is sent to the member, and all subsequent recurring payments will be taken as per normal.
Click the Next button. The wizard will progress to the Confirmation step.

- The confirmation step outlines the payment schedule and the amount that will be deducted upon confirmation. If you have pro-rated payments configured, the pro-rated first payment amount will be shown.
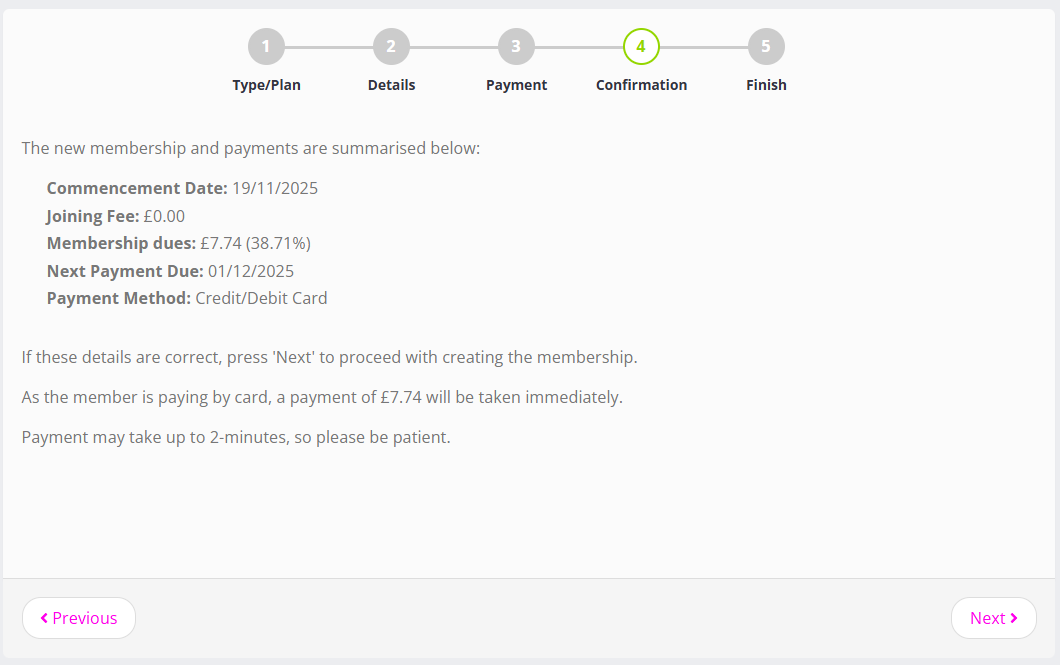
- Click the Next button. The wizard will initiate payment as required. If successful, the membership will be configured, and the wizard will progress to the Finish step.
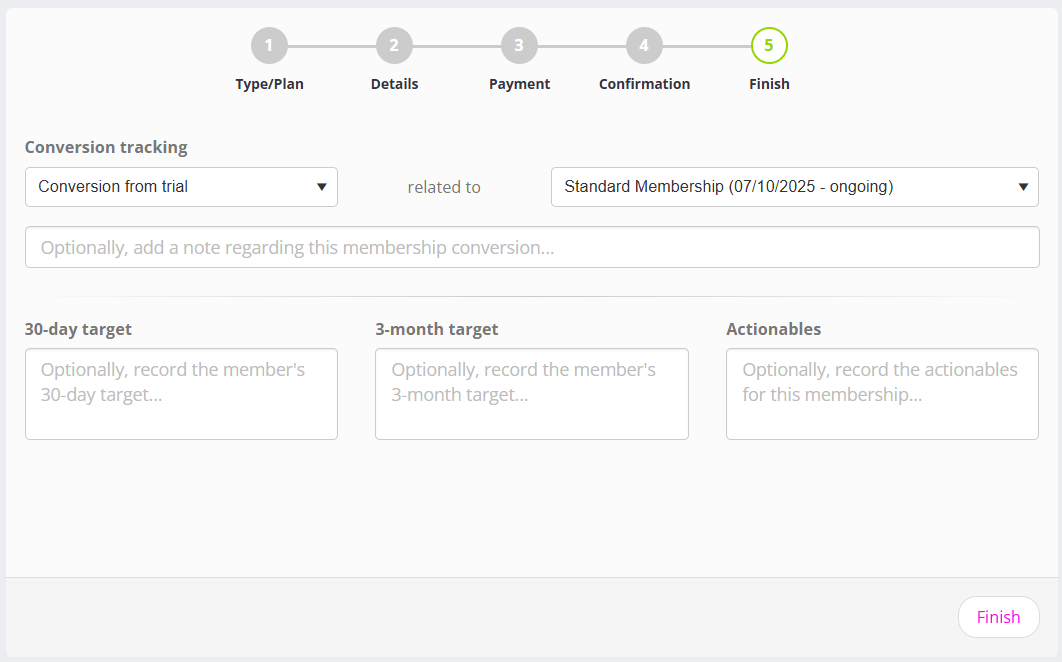
- Within the final step of adding a membership, you may indicate if the membership was a conversion from a previous plus add goals and aims.
If the member has a trial membership, or their last membership was a trial membership, the conversion tracking will be pre-filled. You may amend as you wish.
For trial memberships, the goal data captured comprises Aims and Actionables. For recurring memberships, it comprises 30-day target, 3-month target and Actionables.

Once you have closed the Add Membership wizard, the member record will refresh, and you will see the new membership added. If you do not, click the Refresh button at the top of the member record (next to the Actions drop-down).
In compliance with financial transaction rules, GymOS will send the member an invoice for their payment. If the transaction amount is nil, no invoice is sent. Payments transacted by credit/debit card will be marked as paid on the invoice.