Creating a membership promotion campaign
A membership promotion campaign is one of the built-in GymOS campaign types. The purpose of this campaign type is to provide a simple route for an individual to register their interest and to purchase a trial or membership via the GymOS system.
To create a new membership promotion campaign:
- Navigate to Campaigns from the Connect and Promote section of the main navigation menu.
- Click the Add a new campaign button.
- From the drop-down selection list, select Membership sign-up. GymOS will create a new campaign.
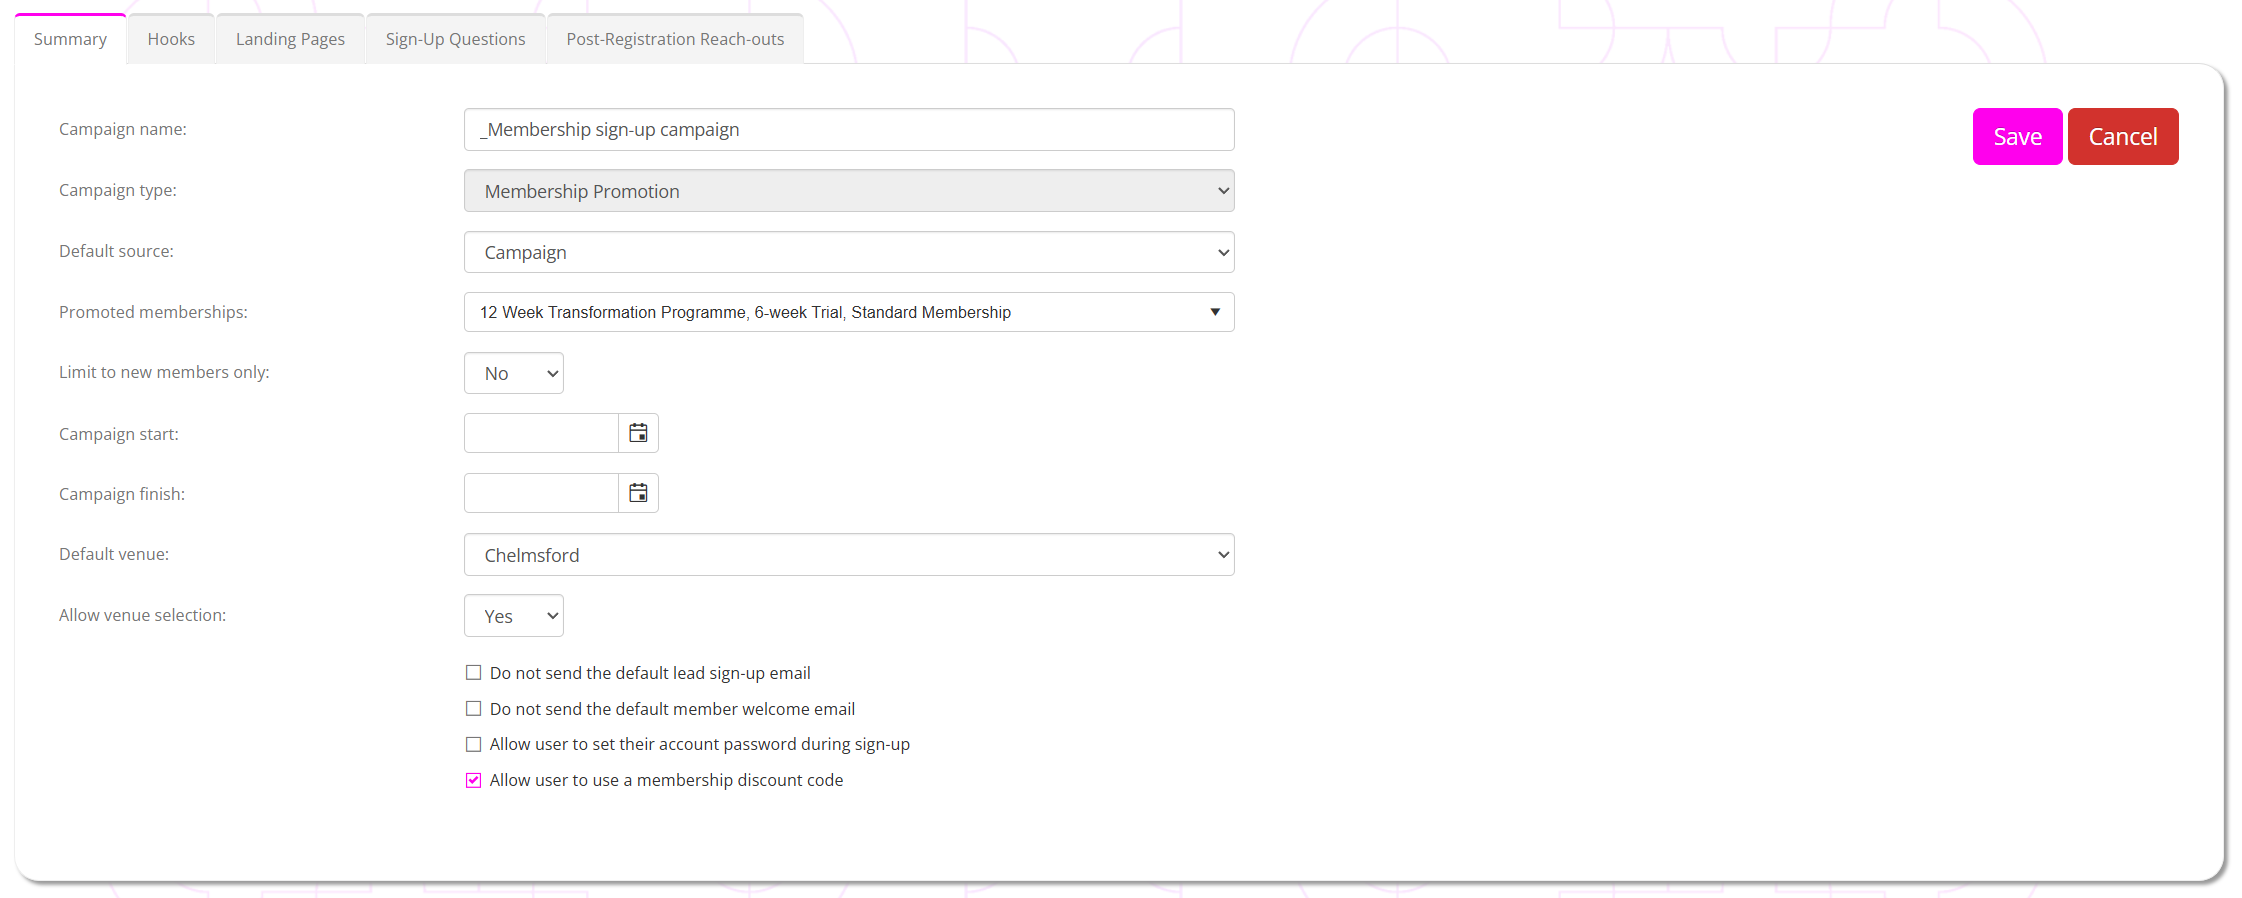
- Provide a meaningful name for your campaign (E.g., “Trial promotion”)
- From the campaign types drop-down list, select “Membership Promotion”.
The page will refresh, and the options may change from those shown previously. - Select a default source for your campaign. This will be the source allocated to any leads originating through this campaign, although these may be overridden by the optional hooks we will set up as we proceed.
You may administer the list of available sources in the lists and groups function. - For promoted memberships, select the membership(s) you want to make available to the lead for purchase.
Note: These memberships must not be marked as private. - Select whether you wish to limit the campaign to individuals who have not previously purchased a membership from you.
- Optionally, provide the campaign’s start and end dates.
You should only provide these if you wish to prevent registrations outside a given date range. - Select the default venue that you wish to associate leads registering against this campaign with.
- If you have only one venue, we recommend setting it as the default venue and selecting No for the allow venue selection option. This reduces the amount of thinking that your lead needs to do when registering, by pre-setting this option for them.
- By default, GymOS will send the lead a default registration confirmation email to comply with GDPR. If you wish to suppress this message and replace it with one of your own (via triggers, reach-outs, or some other means), you may do so by ticking the do not send the default lead sign-up email option.
- By default, GymOS will send the standard member welcome email. If you wish to suppress this message and replace it with one of your own, you may do so by ticking the do not send the default welcome email option.
- Ticking the allow user to set their account password during sign-up enables new members to set their password during the sign-up process, otherwise they will be guided how to set a password as part of the welcome email.
- Ticking the allow user to use a membership discount code enables the discount code feature whereby the user may apply a code to the registration and receive a corresponding discount.
- Click the Save button to commit your selections.
After saving the base configuration of your membership promotion campaign, you will see the following tabs. Review and configure each accordingly, as per the corresponding articles below.
- Summary
A summary of the campaign configuration, along with a graphical representation of landing page visits, registrations, etc. - Hooks
A hook is a publishable variant of the campaign that includes additional tracking data. You may also publish a hook directly onto Facebook, via the GymOS Meta integration. - Landing Pages
A campaign may have one or more landing pages, which you may optionally use as a pre-registration step to your sign-up form. You may also add Facebook and Google Analytics tracking to your pages/form, and specify a custom completion page. - Sign-Up Questions
Optionally add questions to the lead sign-up form and tailor its presentation. - Post-Registration Reach-outs
Configure scheduled reach-out communications after the lead registers, and/or assign a lead nurture program.