The session schedule
The Session Schedule is accessed by selecting the Schedule option from the main navigation menu, amongst other places.
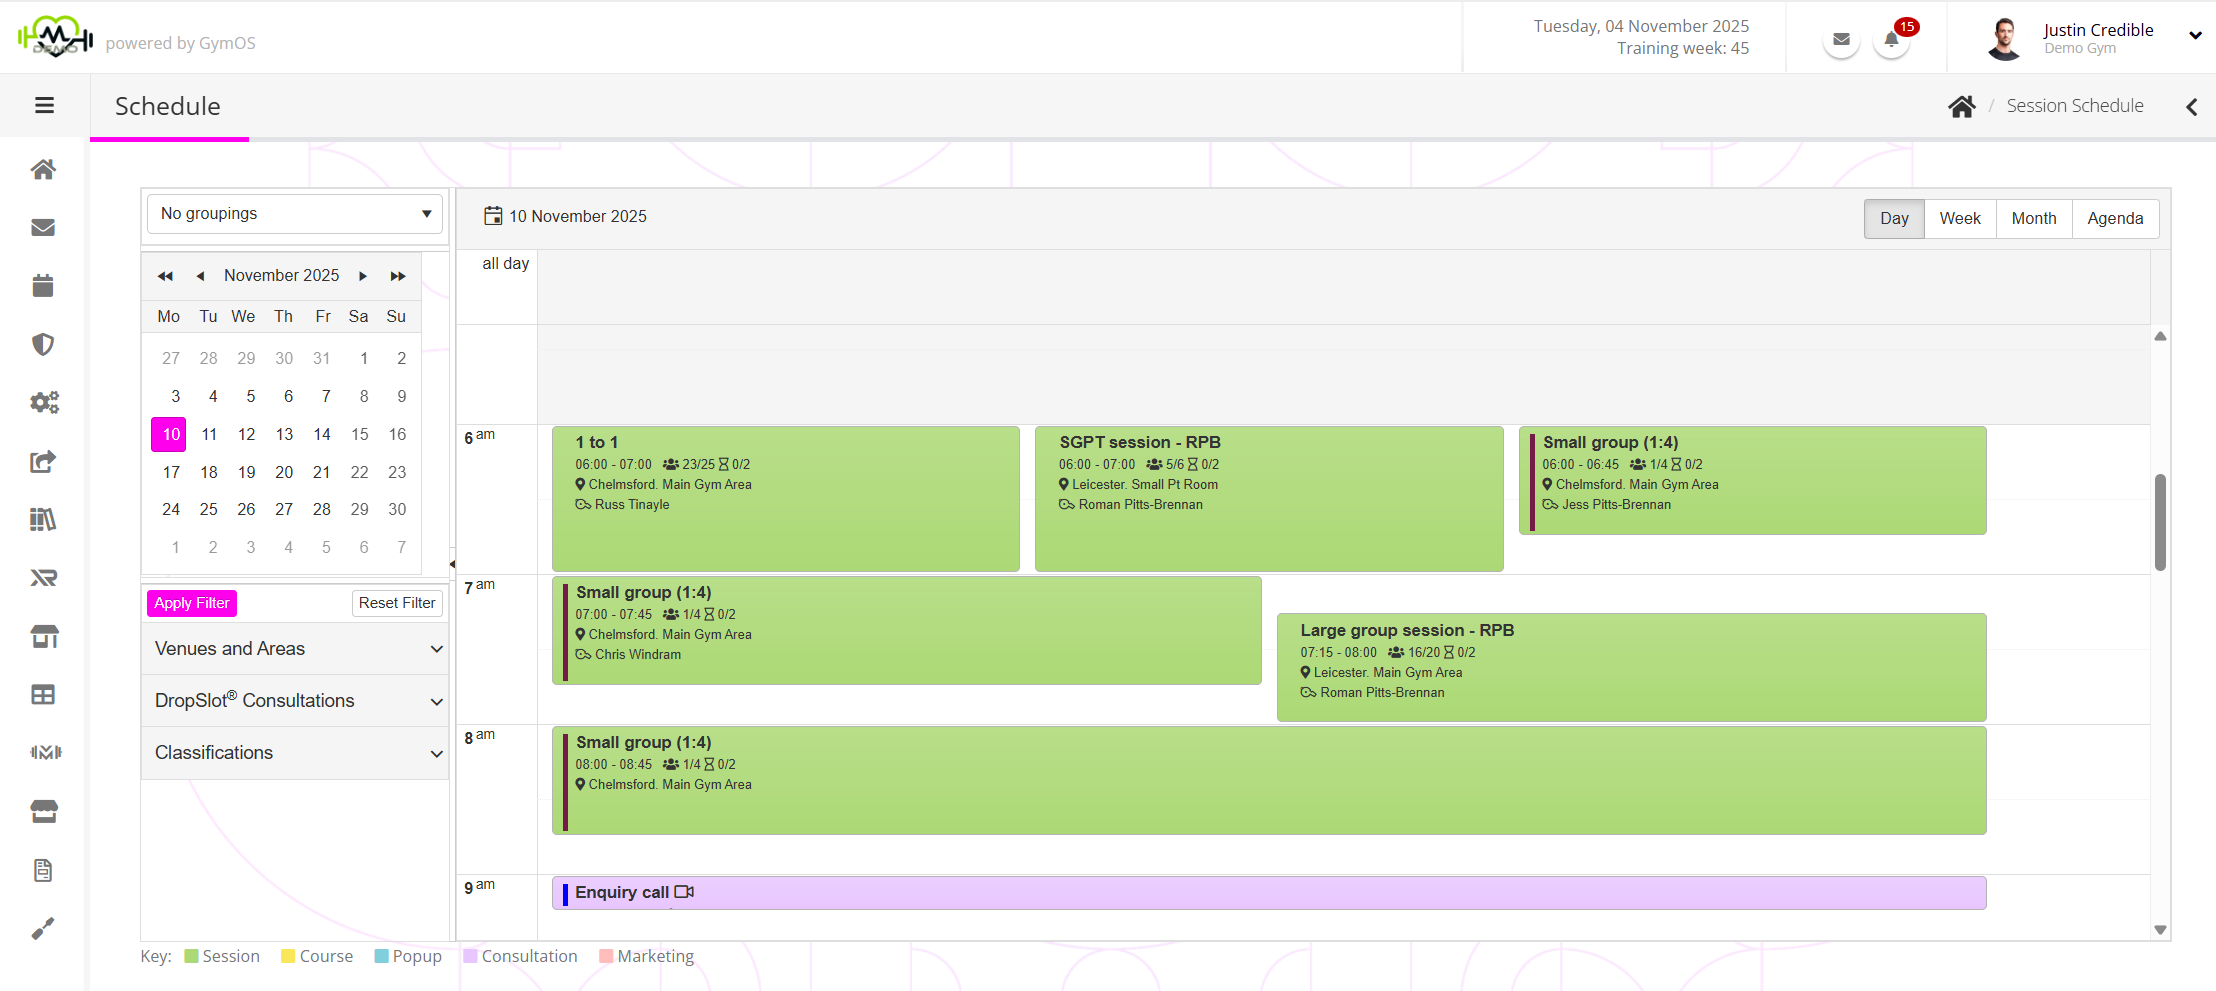
You will likely spend a considerable amount of time within the session schedule when using GymOS, as it provides a convenient view of your training sessions, along with easy access to viewing and taking action on bookings that have been made against them.
For ease of viewing, sessions are coloured by their session type and a colour bar that you may optionally specify per session type:
Session Course Popup Consultation Marketing
Schedule views
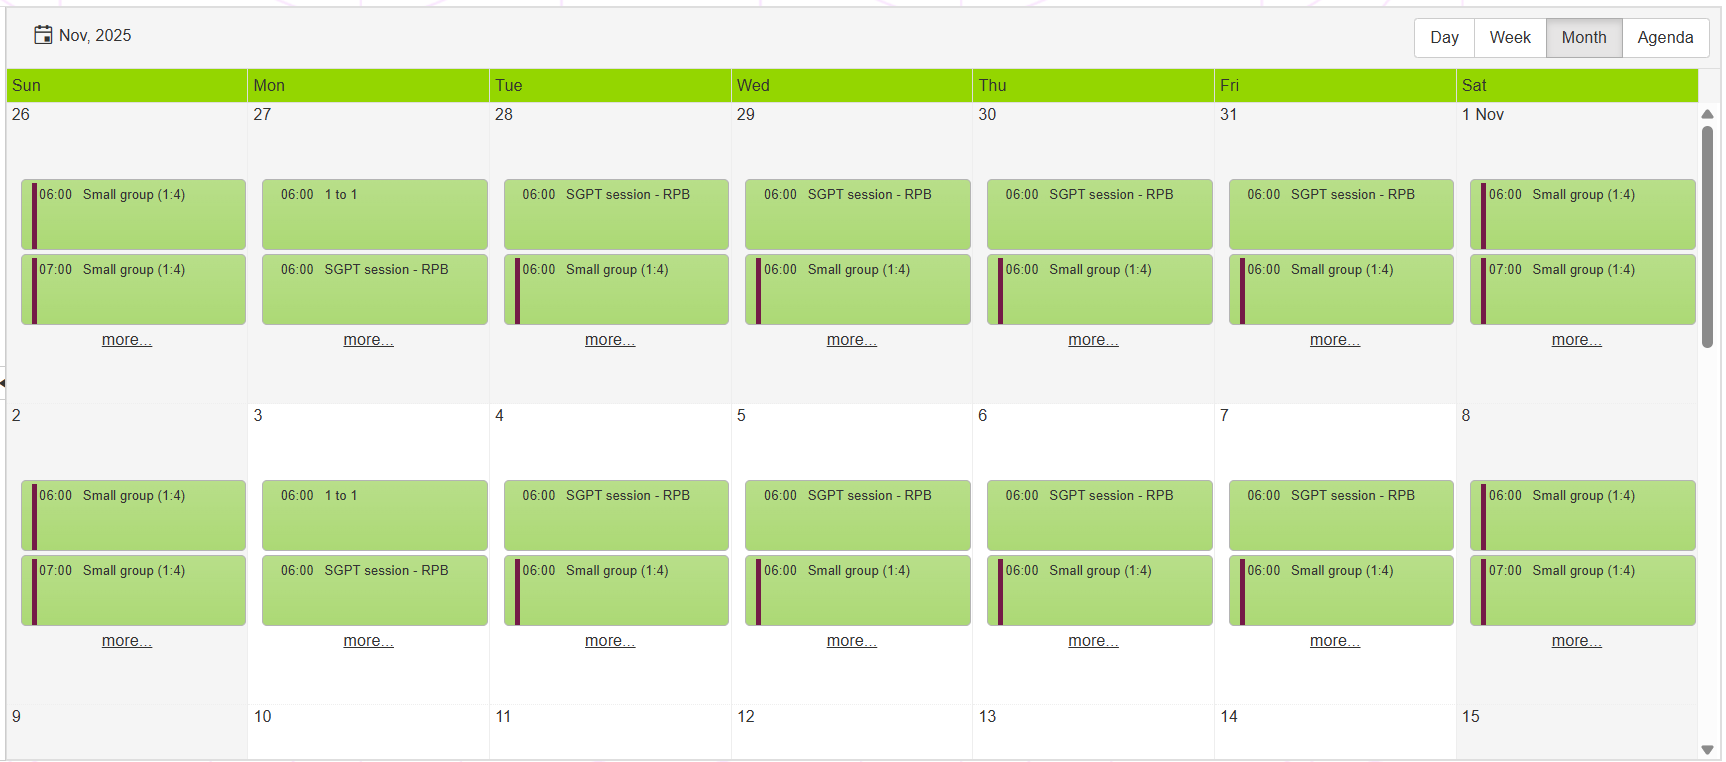
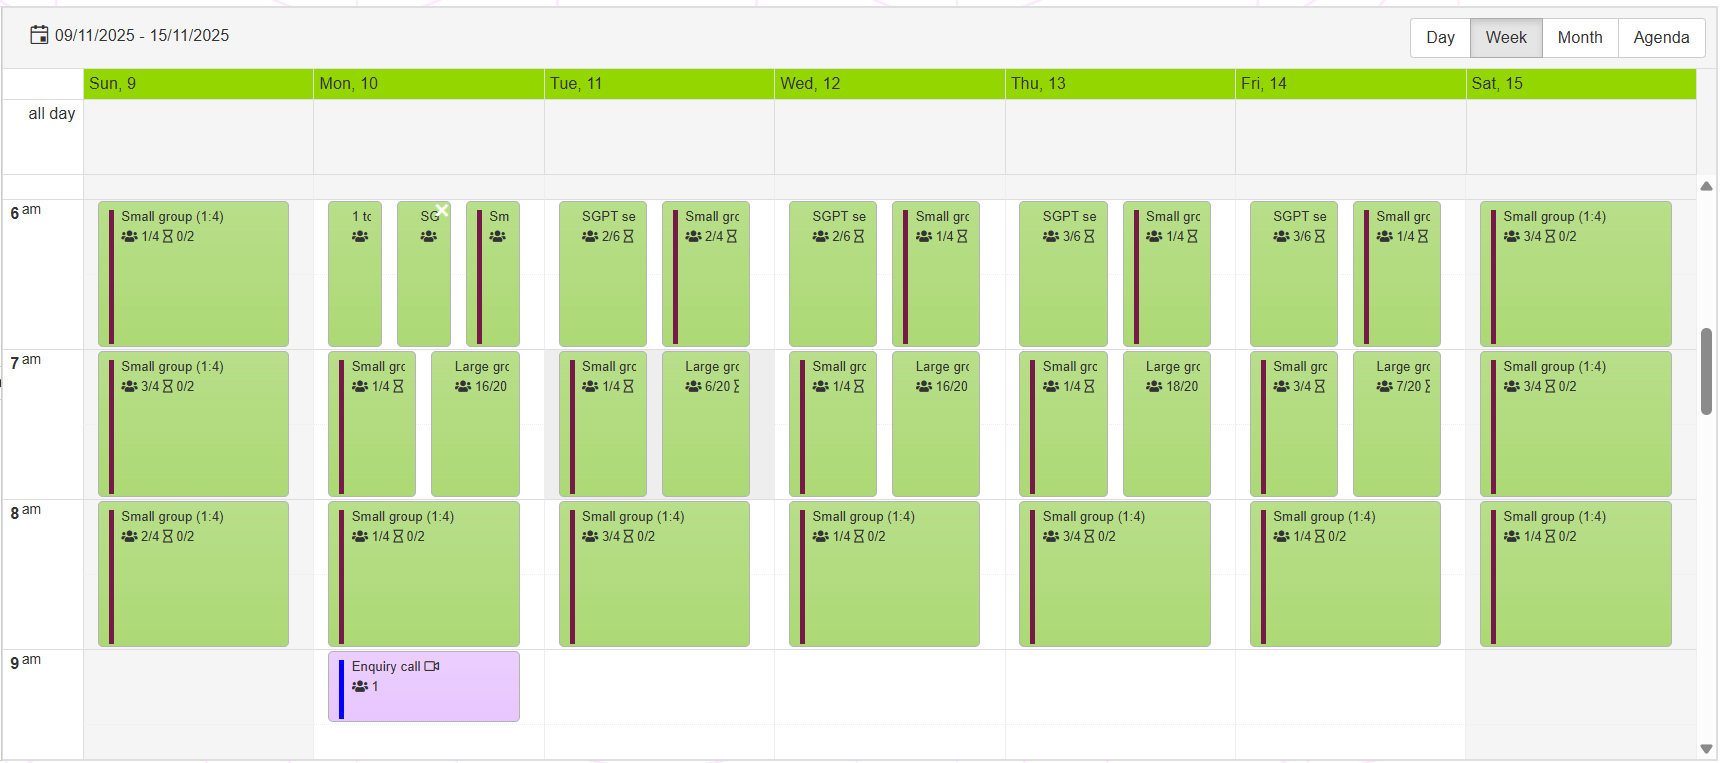
The schedule offers four different schedule views: Day, Week, Month, and Agenda.
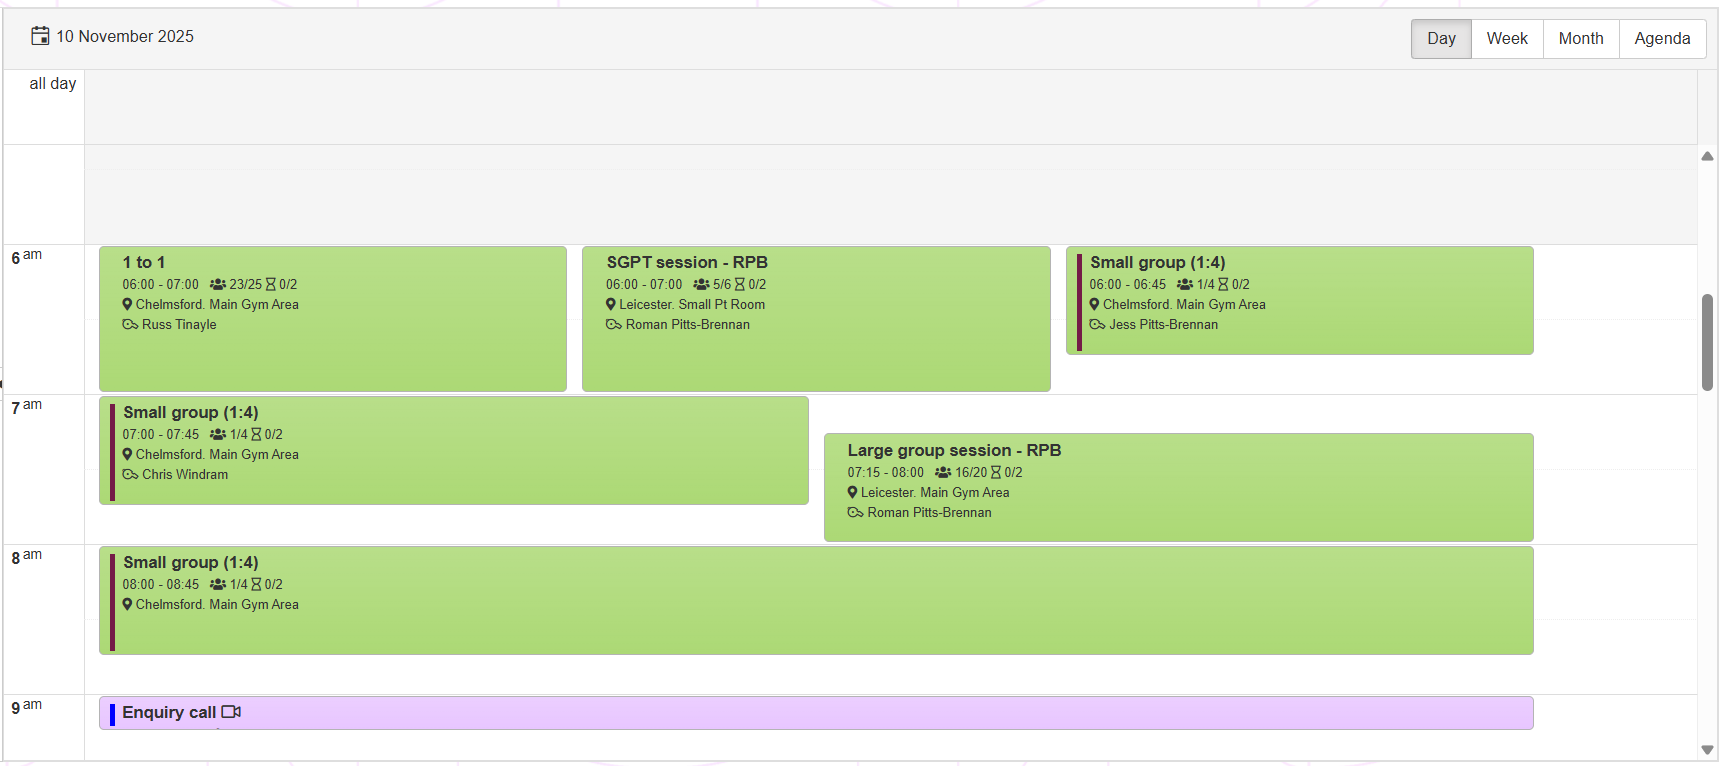
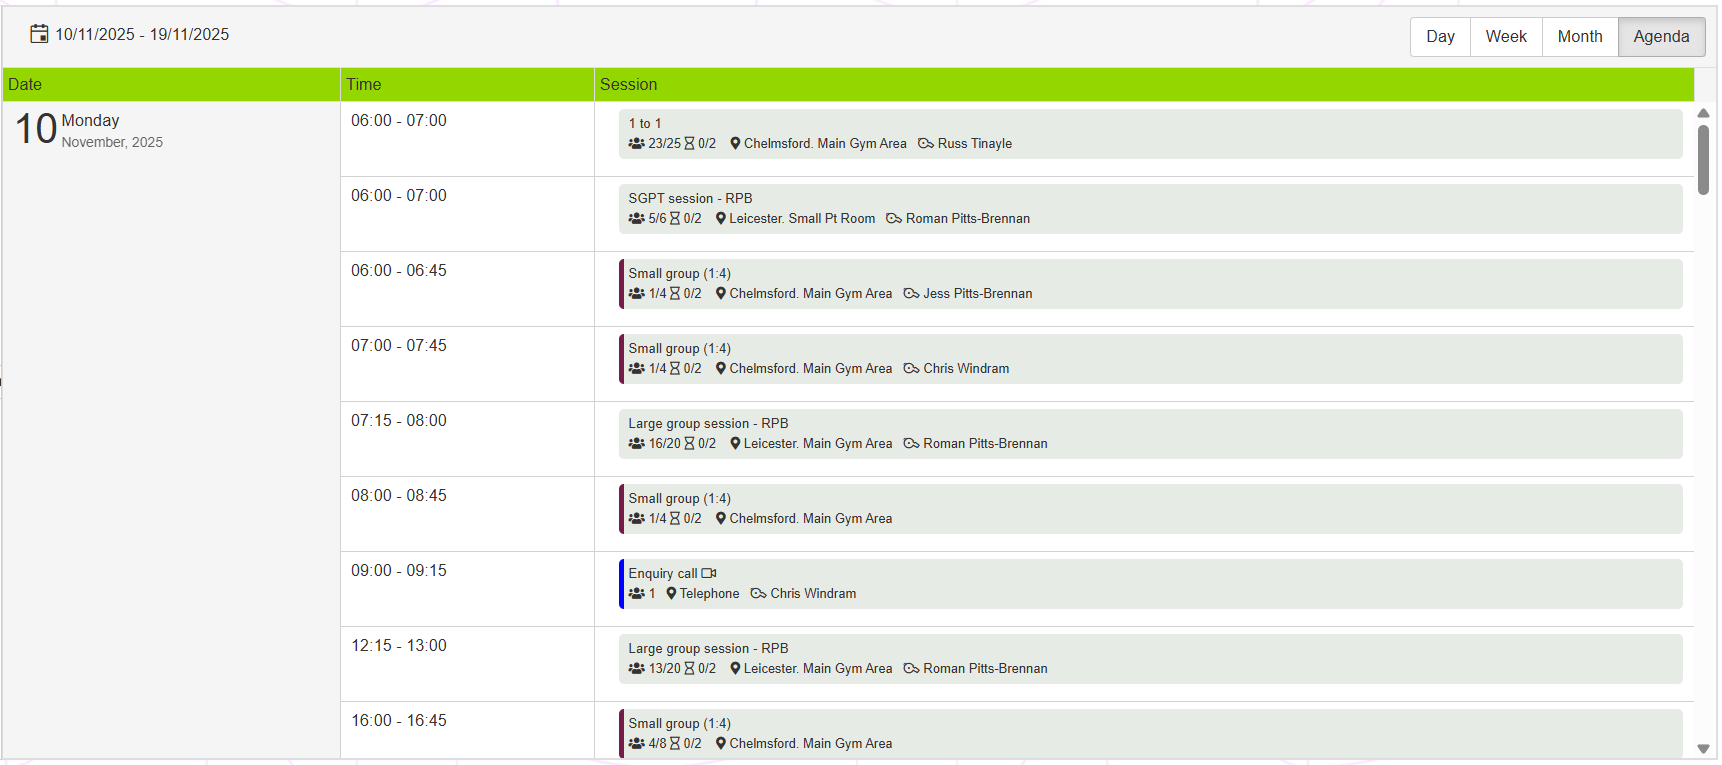
The default view is the Day View, which is likely to be the view you use most often.
By selecting the Group by lead coach/host option from the No groupings drop-down list, columns are applied to the day view to indicate session/consultation allocation by host.
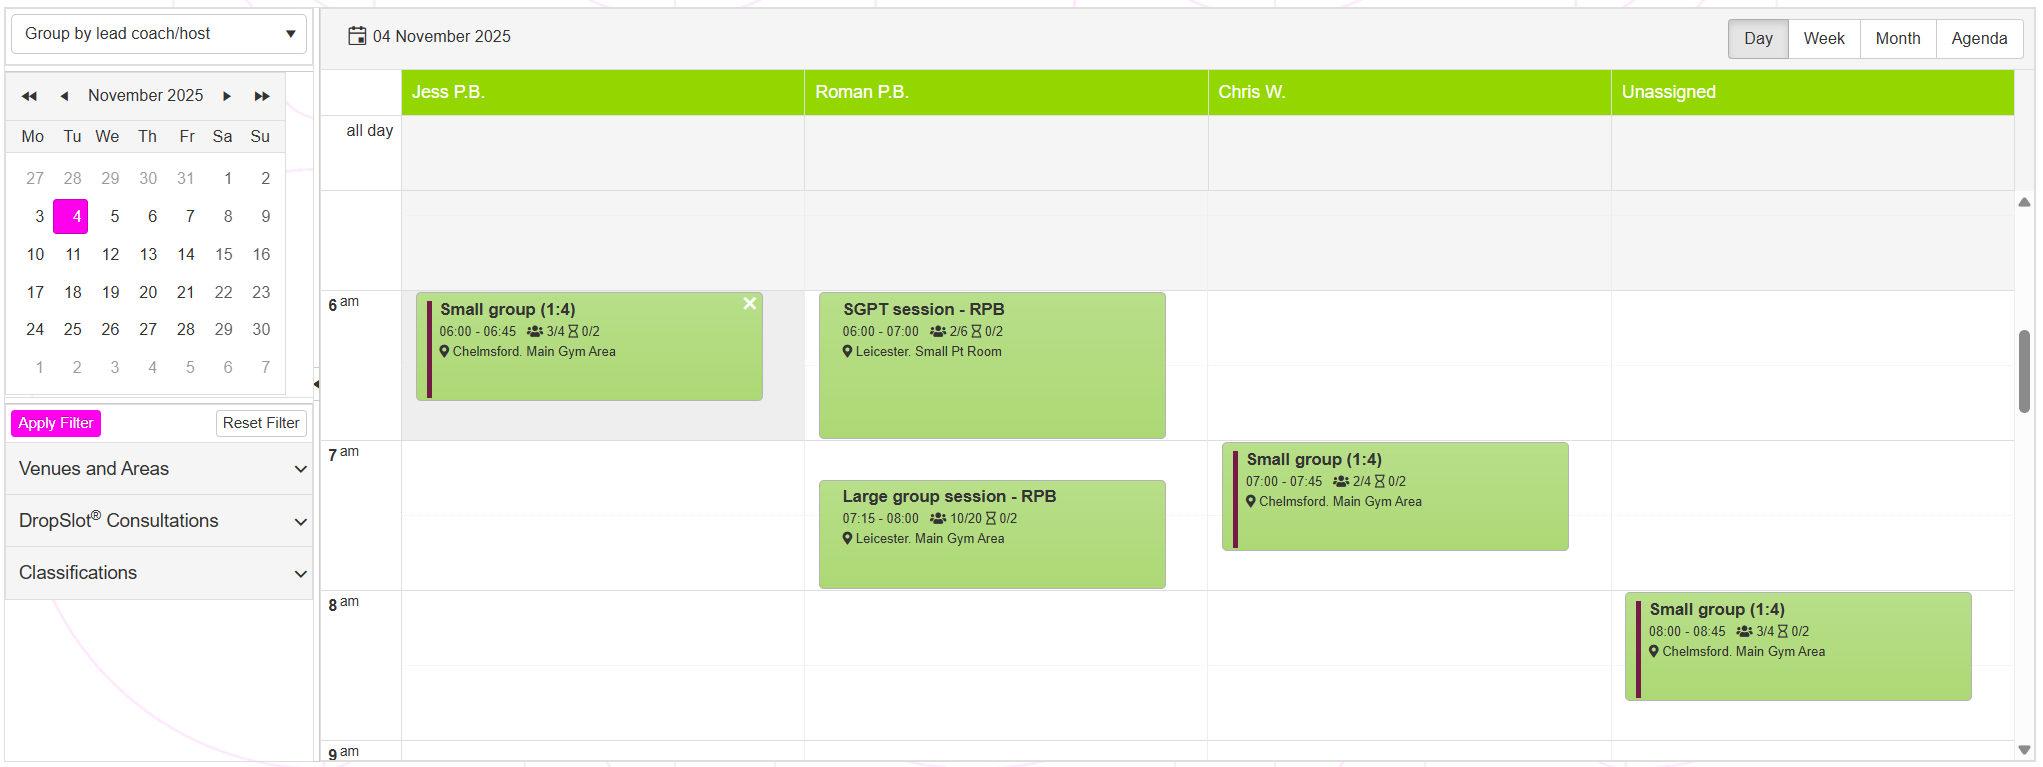
Navigation and filtering
The schedule view is navigated by selecting the day of interest from the calendar on the left-hand side of the screen.
The schedule view may be optionally filtered by selecting options from the Venues and Areas, DropSlot Consultations, and Classifications lists. The filter is then applied by clicking the Apply Filter button. It may be reset by clicking the Reset Filter button.
Session Information
The schedule shows both scheduled sessions and DropSlot consultations. Double-clicking on any given session or appointment opens the corresponding booking pop-up window.
Subject to the context, the information displayed for each session on the schedule comprises:
- The session name or appointment type.
- The start and end time of the event.
- The number of people booked onto the event and the maximum capacity.
- The number of people on the waitlist for the event, and the waitlist capacity.
- The location of the event.
- The lead coach/host of the event.
- For single-attendee sessions, the name of the person booked on to the session.
Note: For sessions or appointments with multiple hosts, the event is displayed only under the first host in the grouping view.
Deleting a session/appointment
Hovering the mouse over a given event will reveal the icon. Clicking on this icon will initiate the cancellation process for all bookings associated with the event and remove it from the schedule. Important: This is a permanent action and cannot be undone.
Context action menu
Right-clicking on a given event opens the context action menu. The options available within the menu depend on whether the event is a session or a DropSlot consultation.
Session action menu
The complete session action menu comprises the following options:
- View/Edit Bookings
Opens the session booking window, where the booked attendees may be viewed and actioned. - Roll Call
Opens the Roll Call pop-up window, from which roll call may be conducted. - Message Attendees
- By Email
Send a message to all attendees of this session by email. - By SMS
Send a message to all attendees of this session by SMS.
- By Email
- Edit Session
If the session has not yet occurred, you may edit the session. - Cancel Session
This initiates the cancellation process for all bookings associated with the event and removes it from the schedule. Important: This is a permanent action and cannot be undone.
DropSlot Consultation action menu
The complete DropSlot Consultation action menu comprises the following options:
- View appointment
Opens the appointment booking window, where the booked attendee(s) may be viewed and actioned. - Cancel appointment
This initiates the cancellation process for all bookings associated with the event and removes it from the schedule. Important: This is a permanent action and cannot be undone.