Member tab: Memberships
The Memberships tab in the member record is where all activities related to assigning memberships, credits, and auto-bookings for a specific member are managed.
The tab comprises three sections:
- Memberships
View the memberships presently assigned to a member, edit a membership, cancel a membership, pause a membership, and assign a new membership. - Goals & Aims
Keep a note of the goals and aims that the member has for their membership, and update during your check-in calls. - AutoBook
Optionally have GymOS automatically book a member into a given session at the time it is added to the schedule, giving that member priority over manual bookings. - Credits
View the credits presently assigned to the member, their validity, and their usage. You can add additional ad hoc credits and use the eligibility checker to determine why a member cannot book a session. - Leaver Tracking
Record when a member gives notice and track reasons for member attrition. Patterns can often be spotted and resolved.
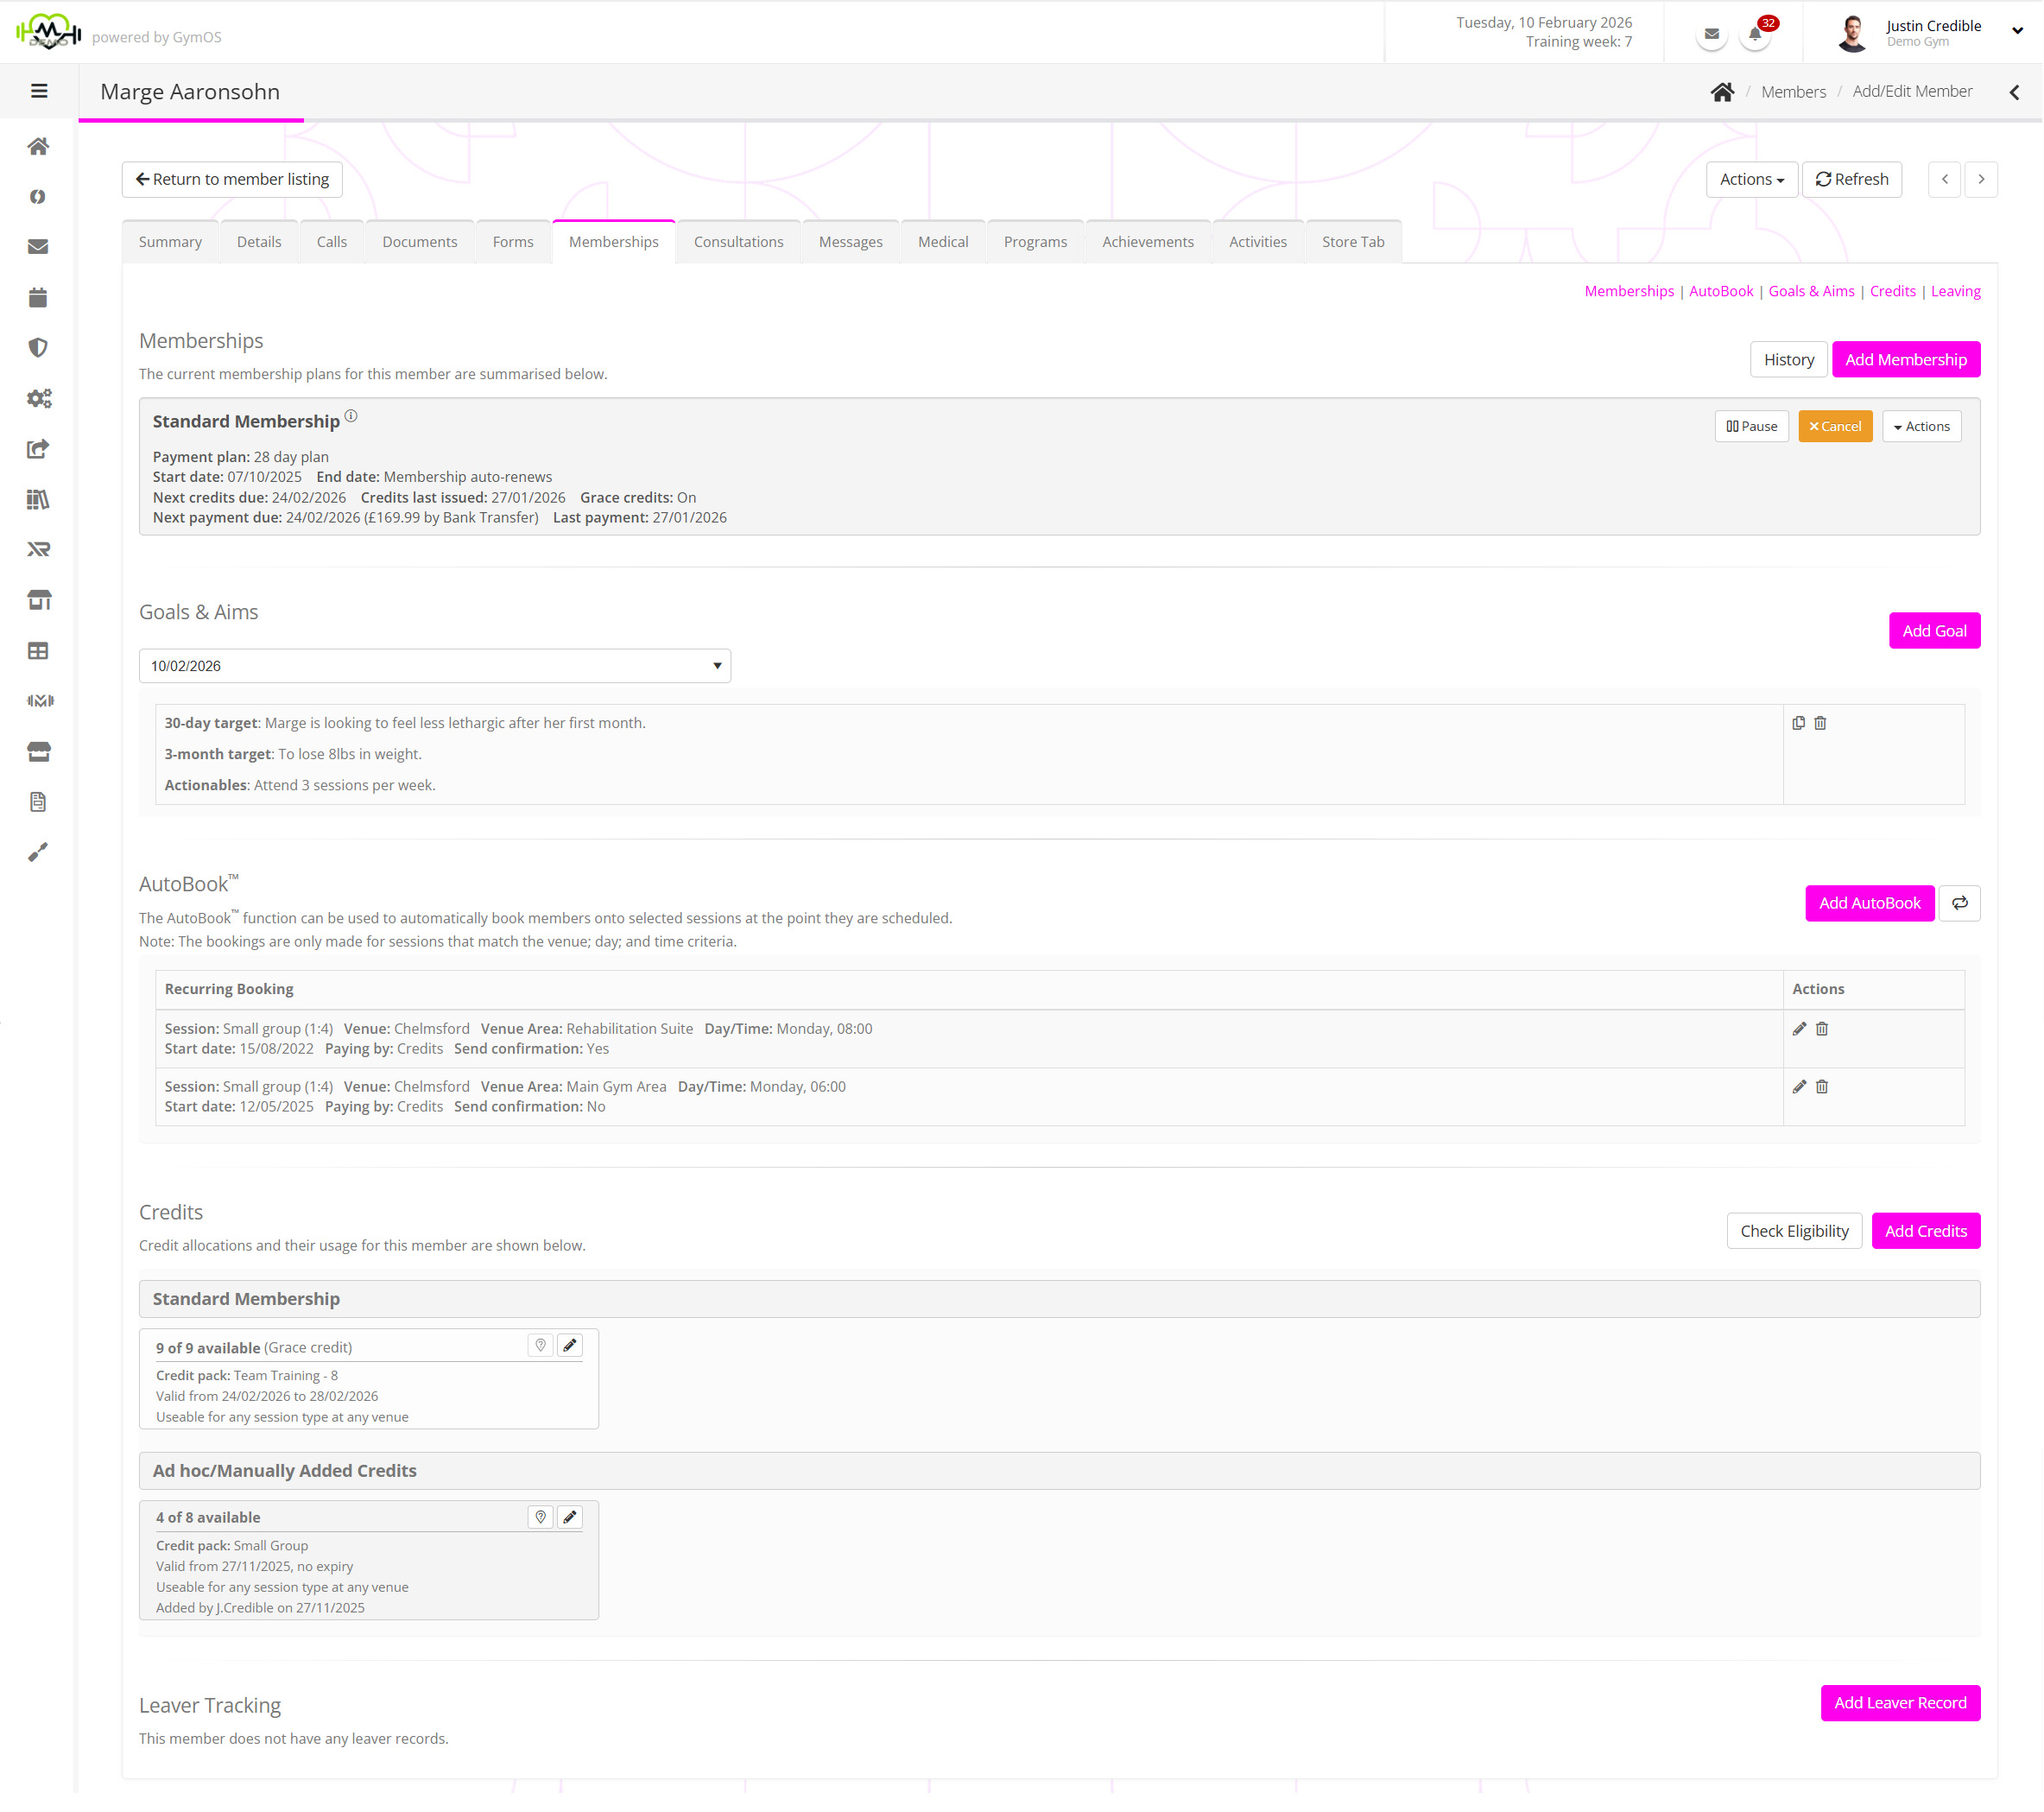
Memberships

The memberships section lists the memberships currently assigned to a member. These may not have yet started.
The information provided for each membership comprises:
- The name of the membership (E.g. Standard Membership)
- The assigned membership plan (E.g. 28 day plan)
- The start and end dates for the membership, or indication that the memberships is auto-renewing (rolling)
- The last date upon which credits were issued and the next date when credits will be issued, along with indication as to whether grace credits are enabled.
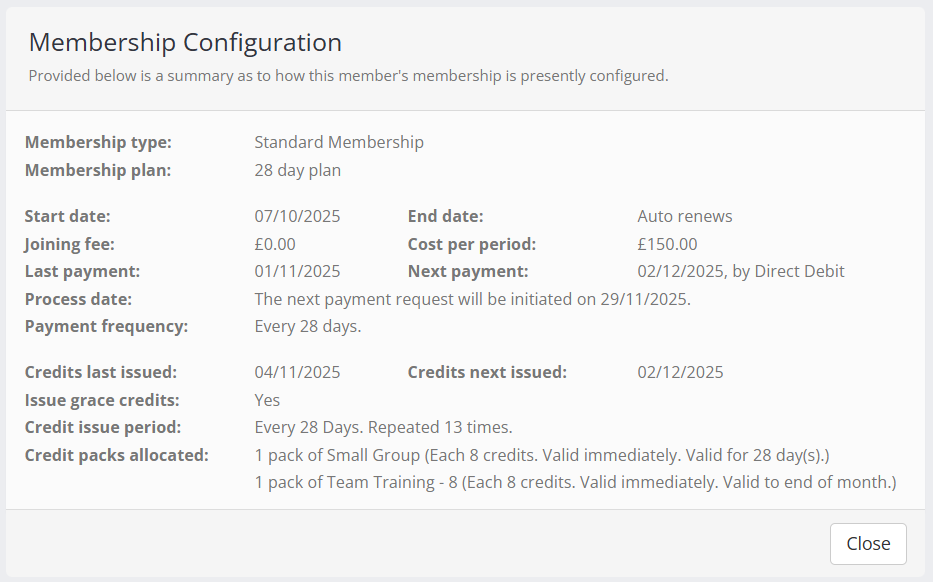
- The date upon which the next payment is due, the amount and payment method, plus the date of the last successful payment. If payment is being made by Direct Debit, hovering over the icon alongside the next payment due date will reveal a pop-up message showing the date on which the Direct Debit will next be submitted (typically 3 days before the due date).
Clicking the icon next to the membership name opens the membership configuration pop-up window. This window allows you to see further details of the configuration for the membership as assigned explicitly to the given member.
A new membership is added to a member by clicking the Add Membership button. Learn more in the Assigning a membership to a member article.
You can pause a membership by clicking the Pause button. You can cancel a membership (immediately or on a future date) by clicking the Cancel button.
The Actions drop-down provides options for Edit membership costs/dates, Scheduled cost adjustments, and Turn off grace credits.
If you select the Turn off grace credits option, you will be asked to verify that you do not wish the membership to issue any further grace credits. We do not recommend turning off grace credits, as this may impede the member’s ability to book the desired sessions and likely lead to frustration.
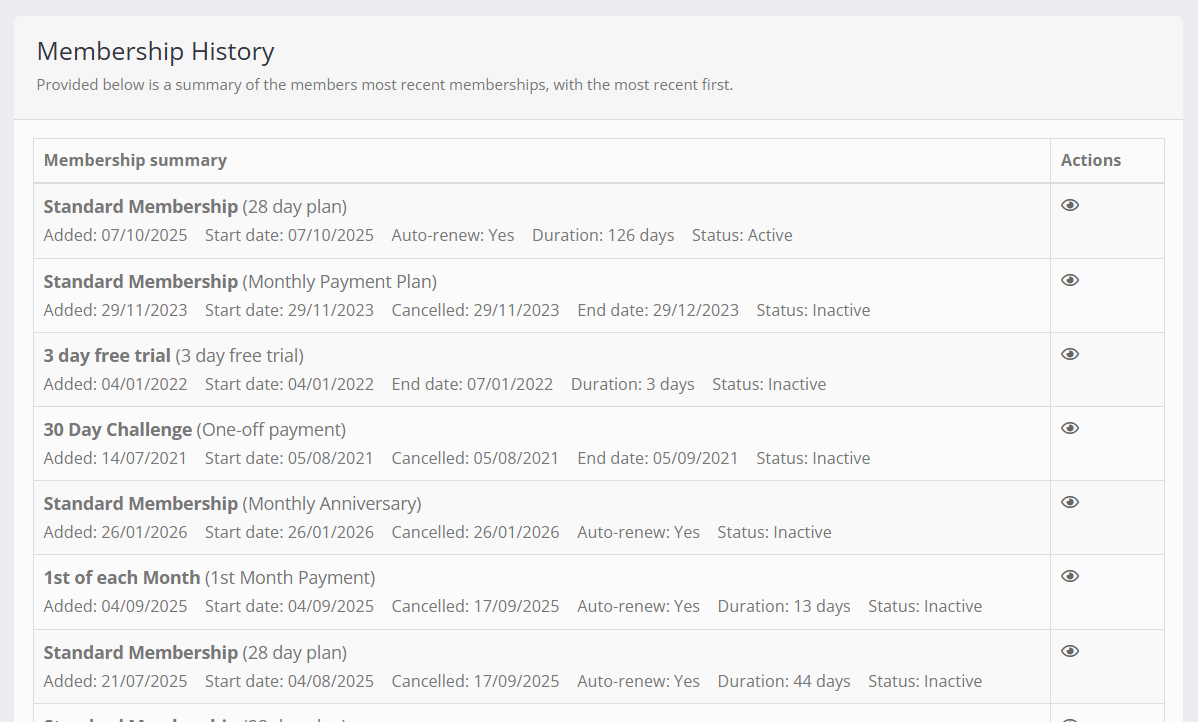
It is possible to view the membership history for the given member by clicking the History button, found just above the membership listing. The history is displayed in a pop-up window. Clicking on the icon shows the detail of that particular membership.
Goals & Aims

Within the Goals & Aims section, you can review current and past goals recorded for the member. By default, the most recently recorded goals are displayed. You may select to review a past set of goals by selecting from the drop down list.
The three elements that comprise goals and aims are:
- 30-day target
- 3-month target
- Actionables
New goals may be added by clicking the Add Goal button. An existing goal may be edited by clicking the icon, or deleted by clicking . Goals and aims are also collected in the final stage of adding a membership to the member record.
AutoBook

Auto-bookings allow you to have the GymOS system automatically book a member into a specified session as soon as it is added to the schedule. This effectively gives them priority booking over other members, who have to book manually.

Learn how to set up and maintain auto-bookings in the Autobooking members onto sessions article.
Credits
The Credits section of the membership tab displays the current credit packs allocated to a member. If a credit pack has been manually added or edited by a team member, this will be indicated alongside the credit pack.
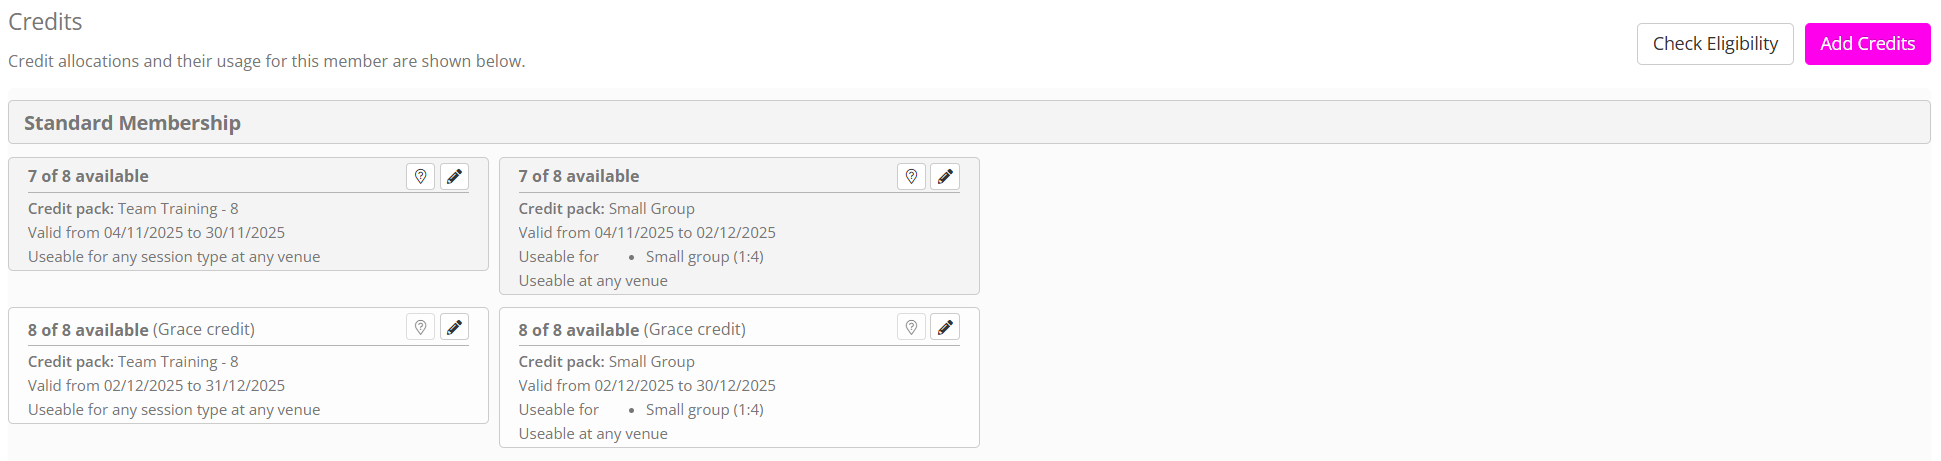
Credits that are shaded in the darker grey are regular credits. Credits that are shaded in the lighter grey are grace credits.
New ad hoc credits can be added to a member by clicking the Add Credits button. Details of this process are detailed in the Allocating ad hoc credits to a member article.
If a member says that they cannot book a session, clicking the Check Eligibility button will initiate the determination process detailed here.
The information displayed for each allocated credit pack comprises:
- The number of credits remaining, and the number originally issued within the given credit pack.
- The name of the credit pack.
- The validity dates for the credit pack. These credits may be used to book sessions with start times within this period.
Important concept: The validity dates apply to the session date, not the current calendar date. - The session type(s) for which the credit pack is valid.
- The venue(s) for which the credit pack is valid.
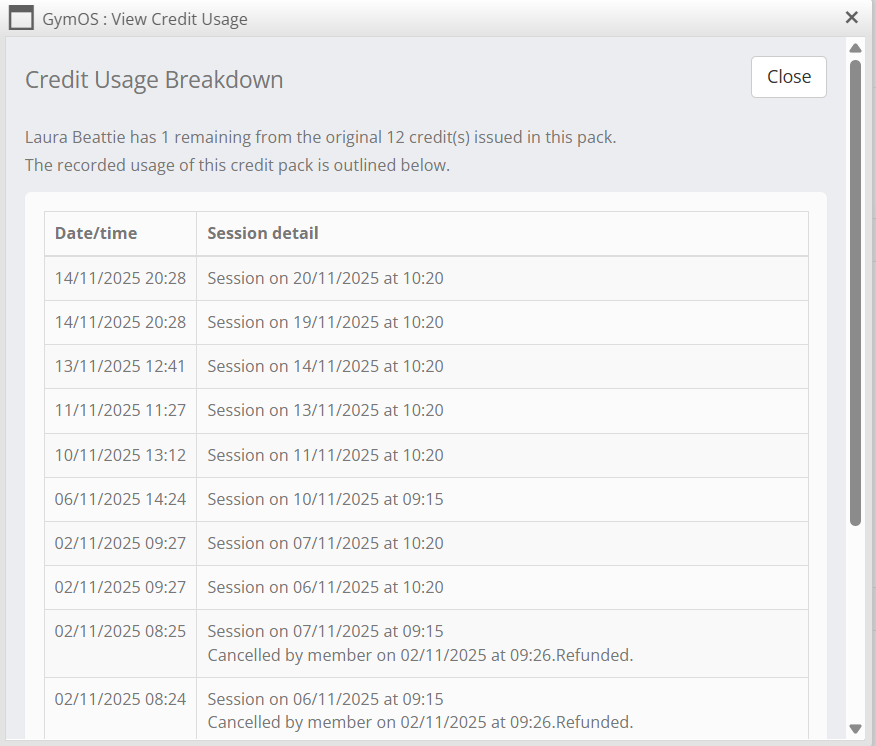
The usage of a credit may be viewed by clicking the button. This opens a pop-up window that displays the history of credit pack usage.
A credit pack may be edited by clicking the button, and following the process outlined in the Editing an allocated credit pack article.
Leaver Tracking
Tracking the reasons your members leave is valuable for ensuring you are aware of potential deficiencies in your business and can identify and fix them.
A leaver record may be created as part of the termination of a membership, or ad hoc by clicking the Add Leaver Record button.
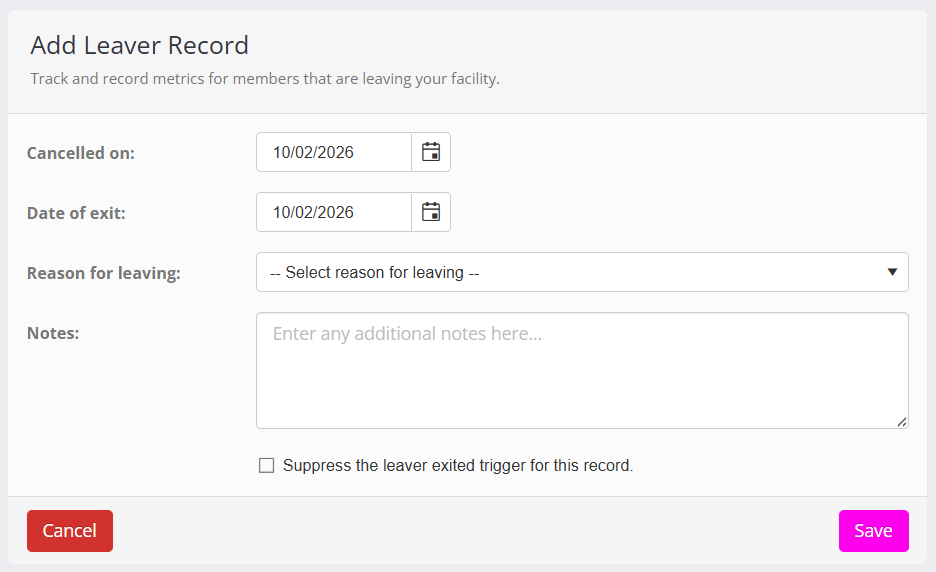
The reason for leaving options are configured in Lists and Groups within the Settings section of GymOS.
A “leaver exited” trigger exists, which can be configured to create a custom workflow when a member finally exits your facility. Checking the “suppress the leaver exited trigger for this record” option prevents the trigger from firing.